No More Loose Pages: Enabling Staple Function on Sharp Printers

April 28, 2025
 0 views
 0 comments
Tired of manually stapling stacks of documents after printing? Let me show you how to enable staple option in Sharp printer and save yourself the hassle. The process is straightforward once you know where to look:
- Check hardware first: Confirm your Sharp printer has a finisher or saddle finisher installed
- On Windows: Open Print dialog → Properties → Finishing tab → Check “Staple” option
- On macOS: Print dialog → Printer Features → Output → Select “Staple” under Binding Edge
- Paper orientation matters: Load paper correctly for desired staple position
- If option is grayed out: Click “Update Now” in printer properties to refresh finisher settings
The stapling function on your Sharp multifunction printer is one of those hidden gems that can transform your document workflow. I’ve seen many office managers find this feature only after months of manually stapling reports and presentations, wondering why they hadn’t enabled it sooner!
Alexis Betts recently shared her experience: “They turned our printer issue not folding and stapling into a success story. Their professionalism, knowledge, and friendly approach left me thoroughly impressed. Our printer now printing as it should.” This perfectly captures how proper configuration makes all the difference.
While most Sharp printers support stapling, you might find the option grayed out or seemingly unavailable in your print dialog. Don’t worry – this typically happens for a few common reasons. Your finisher might not be enabled in the printer settings, you could be working with outdated drivers, or perhaps the paper orientation isn’t compatible with stapling.
The key to troubleshooting lies in understanding how your software connects to the hardware. The finisher—either an inner finisher or saddle finisher—is the physical component that actually staples your documents as they exit the printer. Without this hardware installed, the staple option simply won’t appear in your settings.

Glossary for how to enable staple option in sharp printer:
Staple Function 101 & Preparation
Ever walked into a meeting room to find someone frantically stapling a stack of reports? That’s a scene we see all too often at offices without properly configured Sharp printers. Let’s explain the staple function so you can save time and create more professional documents.
The staple function on your Sharp printer automatically binds pages together as they print, creating polished materials without the tedious manual work. Whether you’re preparing quarterly reports, training handouts, or client proposals, this feature transforms how your team produces multi-page documents.
Types of Finishers Available for Sharp Printers
Your Sharp printer’s stapling abilities depend on which finisher you have installed:
Inner Finishers tuck neatly inside your printer’s body, saving valuable office space. They typically handle up to 50 sheets per staple job—perfect for most everyday office documents.
Saddle Finishers are external units that offer more advanced options. They can handle heftier jobs (up to 100 sheets) and create professional booklets with saddle stitching—ideal if you produce catalogs, manuals, or marketing materials.
| Feature | Inner Finisher | Saddle Finisher |
|---|---|---|
| Staple Capacity | Up to 50 sheets | Up to 100 sheets |
| Installation | Inside printer body | External attachment |
| Booklet Creation | No | Yes (saddle stitch) |
| Paper Size Range | Standard sizes | Wider range (up to 13″×19″) |
| Hole Punch Option | Limited | Available with module |
| Typical Applications | Office documents | Booklets, catalogs, manuals |
As one Sharp user manual points out, “To create materials with a more sophisticated appearance, the staple function can be used in combination with 2-sided printing.” This simple combination lifts basic printouts to professional-grade materials that make an impression.
Compatible Models and Paper Limitations
While most Sharp multifunction printers can work with a finisher, not all models support all finishers. At Associated Imaging Solutions, we help Philadelphia businesses find the perfect match from our selection of Sharp Printers & Copiers.
Before you start stapling, be aware of these common limitations:
Paper types matter. Not all materials can be stapled. Avoid trying to staple thin paper, heavy stock above certain weights, translucent paper, transparencies, or labels—unless you enjoy clearing paper jams!
Size restrictions apply. Stapling typically works with paper sizes from 8½×11″R to 12×18″ (A4R to A3W), though this varies by model.
Sheet capacity has limits. Depending on your finisher, you can staple between 40-100 sheets maximum (including covers or inserts). Trying to exceed this limit is a sure way to cause a jam.

Quick recap: how to enable staple option in sharp printer
Before diving into detailed steps, let’s make sure you’re ready to enable stapling with this quick preparation checklist:
- Hardware Check: Confirm your Sharp printer actually has a finisher installed (it’s that box-like attachment where your finished documents come out)
- Finisher Enabled: Make sure the finisher is recognized in your printer’s system settings
- Driver Status: Update to the latest printer driver for full compatibility
- Paper Compatibility: Use appropriate paper types and sizes, correctly oriented in the tray
- Tray Selection: Choose the right paper tray with compatible paper already loaded
Many of our Philadelphia clients find they’ve had stapling capability for months without realizing it. With these basics covered, you’re ready to move on to the specific steps for how to enable staple option in Sharp printer on your particular operating system.
How to Enable Staple Option in Sharp Printer on Windows
Getting your Sharp printer to staple documents on Windows is surprisingly easy once you know where to look. Think of it as open uping a hidden feature that’s been waiting to make your document preparation much simpler.
Update driver & accessories first
Before you can start enjoying perfectly stapled documents, you’ll need to make sure your computer and printer are properly talking to each other. This might sound technical, but it’s really just a quick check:
Press Windows key + R on your keyboard, type control printers and hit Enter. Find your Sharp printer in the list, right-click it and select Printer properties (be careful not to click “Printing preferences” by mistake).
Now head to the Accessories tab where you’ll see a button labeled Update Now – click this to refresh your printer’s configuration. This is like asking your computer to check what hardware is actually connected to your printer. While you’re there, make sure Automatically Update Printer Information has a checkmark next to it.
Next, click over to the Ports tab and verify that Enable bidirectional support is checked. This two-way communication is crucial – without it, your computer won’t know there’s a finisher capable of stapling attached to your printer.
Click Apply and then OK to save these settings. As one of our technicians often says, “This simple update step solves about 80% of all ‘my staple option is missing’ calls we receive.”
Select staples before you print
With your printer now properly configured, you’re ready to start stapling documents with ease:
Open the document you want to print and click File → Print as you normally would. Select your Sharp printer from the list and click Properties or Preferences to access the detailed settings.
Look for the Finishing tab – this is where the magic happens. Find the Staple checkbox and click it. You’ll now see a dropdown menu appear with various stapling options. Here you can choose between 1 Staple for corner stapling (great for reports) or 2 Staples for edge stapling (perfect for booklets or presentations).
The driver includes a helpful graphic preview that updates to show exactly where your staples will be placed based on your selection. This visual guide takes the guesswork out of positioning – you’ll see precisely how your finished document will look.
For documents mixing different paper sizes, consider enabling the “Force Letter-R for Letter Size” setting. This clever option ensures all pages share the same width for consistent stapling regardless of paper length.
When you’re satisfied with your selections, click OK to save these settings, then click Print to send your job to the printer with stapling enabled. In a few moments, you’ll have professionally finished documents ready for distribution.
If you’re curious about how printer drivers work and why they’re so important, check out our detailed article on What is a Printer Driver? for more insights.
How to Enable Staple Option in Sharp Printer on macOS
Mac users have their own pathway to stapling nirvana with Sharp printers. While the interface looks different from Windows, the concept remains straightforward once you know where to look.
Sync macOS driver if options are missing
Sometimes your Mac might lose touch with your printer’s capabilities. If you don’t see stapling options, a quick reset often solves the problem:
- Click the Apple menu → System Preferences
- Select Printers & Scanners
- Right-click (or Control-click) in the printer list and select Reset printing system
- Confirm the action when prompted
- Re-add your Sharp printer by clicking the + button
- Select your printer from the list and ensure the correct driver is selected
- Click Add
This refresh helps your Mac refind your printer’s full capabilities, including that hidden stapling talent. Think of it as reintroducing old friends who’ve lost touch.
Print with correct tray & layout
Ready to staple on your Mac? Here’s the magic path to perfectly bound documents:
Open your document and choose File → Print. If the dialog looks too simple, click Show Details to reveal the good stuff. Look for the dropdown menu (likely showing “Layout” by default) and switch it to Printer Features.
Under Feature Sets, select Output. Now you’ll see the Binding Edge option – this is where you tell your printer which edge gets the staples. Select your preferred edge, then choose Staple and pick how many staples you want (1 or 2).

For truly professional results on your Mac, remember these friendly tips:
Match your orientation to your staple position. If you’re stapling along the left edge, portrait orientation usually works best. For top-edge stapling, landscape might be your friend.
Combine duplex with stapling for that extra professional touch. As Sharp’s own documentation notes, “Combining two-sided printing with stapling yields a more sophisticated output.” This pairing works wonders for reports and presentations that need to impress.
Use “Force Letter-R” when available, especially if you’re mixing document sizes. This ensures all pages align properly for consistent stapling, preventing that awkward “pages don’t quite line up” situation.
Paper orientation matters tremendously with stapling. If your staples aren’t appearing where expected, try changing your document orientation or selecting a different binding edge. Sometimes a simple 90-degree rotation solves mysterious stapling problems!
At Associated Imaging Solutions, we’ve helped countless Mac users open up the full potential of their Sharp printers. The right settings make all the difference between frustration and flawlessly finished documents.
Fine-Tuning, Troubleshooting & FAQs
We’ve all been there – you’ve followed every step correctly, but the stapling feature still isn’t working as expected. Don’t worry! Most stapling issues have simple solutions once you know what to look for.
Common errors when enabling staple option in Sharp printer
When the staple option appears grayed out in your print dialog, your computer likely hasn’t properly detected the finisher hardware. This is actually quite common! Head to the Accessories tab in your printer properties and click that “Update Now” button. While you’re there, make sure “Automatically Update Printer Information” and “Enable bidirectional support” are both checked. This forces your computer to have a proper conversation with your printer about its capabilities.
Paper orientation mistakes can sabotage your stapling efforts too. Stapling happens along the leading edge as paper exits the printer. If you’re trying for a corner staple in the top-left, but your paper is oriented for the top-right, you’ll end up with misplaced staples. Take a moment to visualize how the paper will move through the machine relative to your desired staple position.
Sometimes your applications can work against you by overriding driver settings. As one of our technicians likes to say, “Don’t ask the machine for something it can’t give you.” If you’ve enabled collation in both your application and the printer driver, they might conflict. Let the printer driver handle both collation and stapling for best results.
Not all paper can be stapled, no matter how much we might want it to be. Thin paper, heavy cardstock, transparencies, and labels typically resist stapling. Standard office paper (20-24 lb weight) is your best friend for reliable stapling results.

Manual stapling when finisher absent
Did you know many Sharp MFPs have a secret weapon? Even without an automatic finisher, your machine might include a built-in manual stapler on the side – a feature many users find only after years of ownership!
To use this handy feature, simply insert your document face down into the finisher slit. Wait for the indicator light to flash (or press the dedicated stapling button on some models), and voilà – your document gets a perfect staple. You can typically staple up to 40 pages at once, which covers most everyday stapling needs without investing in a full finisher.
Quick maintenance checklist
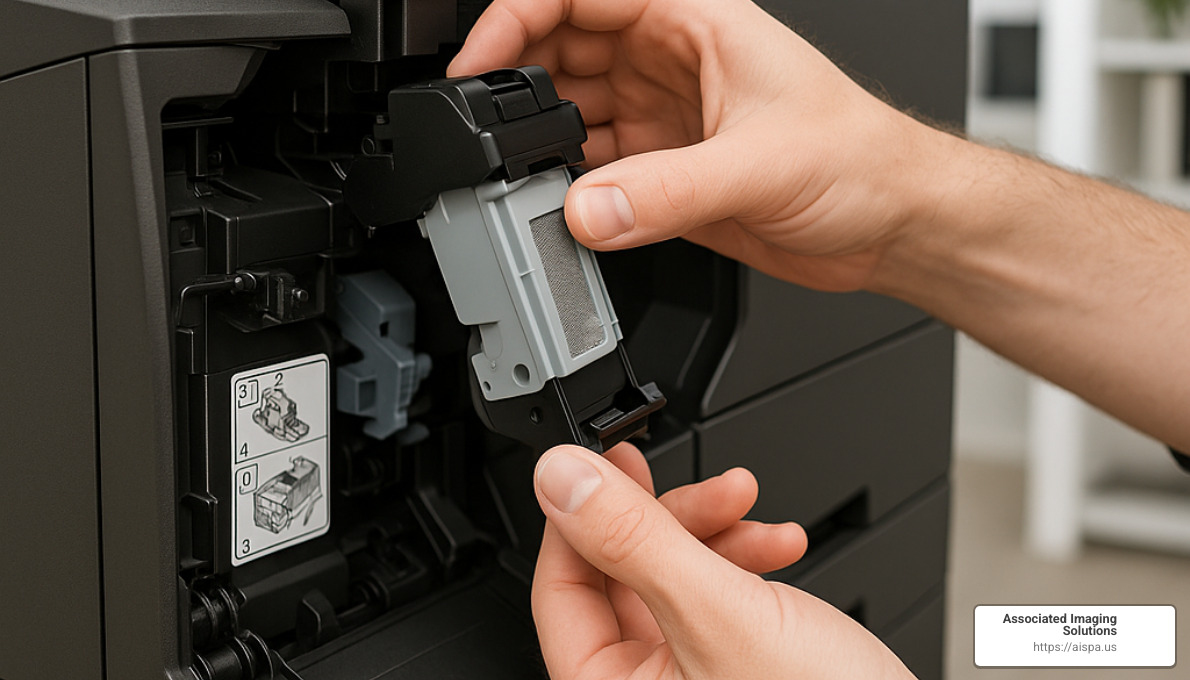
Keeping your stapling function working smoothly requires occasional maintenance. When your control panel flashes “Add staples” or “Staple cartridge empty,” it’s time for a quick refresh. Open the finisher’s front cover, pull out the staple cartridge case, and swap the empty cartridge for a fresh one. Push everything back in until you hear that satisfying click, close the cover, and you’re back in business.
Staple jams happen to the best of us. When they do, open the finisher’s front cover and locate any jammed staples. Most Sharp models include a small tool specifically for removing these stubborn staples – quite thoughtful of them! Check the entire staple path for any hidden obstructions, reset the mechanism if needed, and run a test print to make sure everything’s flowing smoothly again.
For more detailed guidance on replacing consumables like staple cartridges, our guide on How to Replace Cartridge walks you through the process with step-by-step instructions.
Regular maintenance keeps your stapling function reliable when you need it most. At Associated Imaging Solutions, we find that offices with a quick maintenance checklist tend to experience fewer interruptions in their document workflow – just another way we help keep your office running smoothly.
Conclusion
Mastering the staple function on your Sharp printer transforms your document workflow from tedious manual stapling to effortless professional finishing. Throughout this guide, we’ve walked through the essential steps to make this happen:
- Confirming your finisher hardware is properly installed and recognized
- Updating your printer driver to communicate with the finisher
- Selecting the appropriate staple option in your print dialog
- Choosing the right staple position for your specific document
- Using compatible paper loaded in the correct orientation
When everything clicks into place, the how to enable staple option in Sharp printer process becomes second nature, and you’ll wonder how you ever managed without it. The difference between manually stapled documents and professionally finished printouts is immediately noticeable to clients and colleagues alike.
“This function saves considerable time when preparing handouts for a meeting or other stapled materials,” our customers frequently tell us. In busy offices where every minute counts, eliminating the manual stapling bottleneck can reclaim hours of productivity each week.
Combining stapling with two-sided printing creates particularly sophisticated documents that lift your organization’s image. That small metal fastener in the corner of your report might seem insignificant, but it speaks volumes about attention to detail and professionalism.
At Associated Imaging Solutions, we’ve helped businesses across Philadelphia and throughout Pennsylvania streamline their document workflows with properly configured Sharp printers. Our technical team specializes in ensuring your stapling function works flawlessly, whether your business operates in Altoona, Pittsburgh, Harrisburg, or any of our other service areas.
The staple function is just one piece of the productivity puzzle. Modern Sharp multifunction printers offer comprehensive document management solutions—from automatic document feeders to advanced scanning capabilities—that can transform how your team handles information.
Ready to explore the full range of capabilities available with modern multifunction printers? Explore all copier & printer solutions from Associated Imaging Solutions.
Whether you’re looking to purchase, lease, or rent a Sharp printer with stapling capabilities, our team is here to help you find the perfect solution for your specific business needs. We believe in combining local expertise with global standards to ensure you get the most from your office technology investments—turning small details like properly stapled documents into big impressions.
Related Posts
— Decode and Clear: Handling Sharp Photocopier Error Codes
— How to Download Sharp Drivers: 3 Methods That Guarantee Results