Time for a Change: when and How to Replace Cartridge of Your Printer

December 23, 2023
 0 views
 0 comments
How to Replace Cartridge of Printer
Printers are essential tools in any office setting, providing a reliable means of producing high-quality documents and images. However, over time, the printer cartridge will need to be replaced to ensure continued optimal performance. Knowing when to replace the cartridge and how to do so is crucial for maintaining the efficiency of your printer.
To determine if it’s time to replace the cartridge, monitor the print quality for signs of fading or streaking. Additionally, keep an eye out for error messages indicating low ink levels. When it’s time to replace the cartridge, carefully follow the manufacturer’s guidelines for your specific printer model. Properly disposing of the old cartridge and installing the new one will ensure that your printer continues to produce clear, professional documents. Regularly replacing the cartridge will extend the life of your printer and save you from unnecessary downtime.
Understand Your Printer
Different printer models offer various features such as wireless connectivity and high-speed printing. Types of cartridges include ink and toner cartridges, each with specific operating instructions. When it’s time to replace a cartridge, follow the manufacturer’s guidelines to prevent the print head nozzles from drying out.
The replacement cartridge should be vacuum-packed to maintain reliability. Always store cartridges in a cool, dry place. When removing and installing ink cartridges, be mindful of the ink supply port to avoid any excess ink. Always keep replacement cartridges handy and test print jobs immediately after installation. Following these steps will ensure your printer operates smoothly and efficiently.
Different Printer Models
When it comes to different printer models, there are a variety of options available on the market to suit your specific needs. From compact and portable printers to large-format and high-speed models, the choices can be overwhelming. It’s important to consider factors such as printing volume, print quality, and connectivity options when selecting the right printer for your home or office.
Some printers are designed for photo printing, while others excel at text documents. Understanding the capabilities and limitations of different printer models will help you make an informed decision when purchasing a new printer for your printing needs.
Types of Cartridges
After familiarizing yourself with different printer models, let’s delve into the crucial topic of understanding the various types of cartridges. When it comes to types of cartridges, it’s important to know that there are two main categories: toner cartridges and ink cartridges. Toner cartridges are used in laser printers and contain a fine powder, while ink cartridges are used in inkjet printers and contain liquid ink. It’s essential to handle ink cartridges with care, as they are vacuum packed to maintain reliability.
When handling ink cartridges, always store them upside-down to prevent the ink from drying out. Additionally, ensure that the cartridges are installed properly to avoid any bad electrical connections. Understanding the different types of cartridges will help you maintain your printer’s functionality and ensure high-quality prints.
Operating Instructions
Operating Instructions
To ensure proper operation of your printing equipment, it’s crucial to follow these steps when handling ink cartridges. When you’re ready to install the ink, open the printer and move the print head to its home position. Take care not to touch the flat white cable inside the printer to avoid damaging your product.
Always protect the ink supply area from dirt and dust and store cartridges upside-down. The ink supply port is designed to contain any excess ink, so avoid touching it or the surrounding area. Remember to keep ink cartridges out of the reach of children and pets, and store them in a cool, dry place. After replacing the cartridges, print a test page to ensure everything is in working order.
Identify when to Replace the Cartridge
When running low on ink, the printer’s warning message will indicate “out of ink” or “low ink levels.” If ignored, the print quality may deteriorate, prompting the need to change the cartridge. Additionally, an outdated cartridge can cause damage to the printer.
To avoid this, always store new ink cartridges in a cool, dry environment as the printer may dry out. When the warning appears, immediately remove the cartridge and replace it to prevent any damage to your product. Contact customer support if you are unable to print after installing a new cartridge. Always look inside the printer until you are ready to replace the cartridge.
Low Ink Levels
After understanding your printer, it’s crucial to identify when to replace the cartridge. One clear sign is when the low ink levels warning appears. When this occurs, it’s essential to act promptly to prevent any damage to your printer. Low ink levels can cause the print quality to decline, leading to faint or streaky prints. To avoid this, always have replacement cartridges on hand to avoid any printing interruptions.
When you notice low ink levels, it’s time to replace them to prevent any issues. Always open ink cartridge packages immediately after removing the old cartridges. Remember, ink cartridges are vacuum packed to maintain reliability, so replace them to ensure optimal printing performance.
Cartridge Is Outdated
If you notice that your print cartridge is outdated, it’s time to consider getting a replacement. An outdated cartridge can lead to poor print quality and even damage to your printer. When cartridges become outdated, the ink supply port or surrounding area may become contaminated, which can cause issues with the printer’s performance. Always store ink cartridges in a cool, dry place with the label facing up to ensure they stay in good condition.
Leaving your old cartridges in the printer may damage your product, so it’s important to remove an outdated cartridge and properly dispose of it. Remember, an outdated cartridge can lead to print quality issues and potential damage to your printer, so it’s crucial to stay on top of when your cartridges need to be replaced.
Damage to Cartridge
When it comes to your print cartridge, it’s important to be aware of potential damage. Mishandling the cartridge can lead to leaks, which can cause a mess and potentially damage your printer. If the ink gets on your skin, into your eyes, or into your mouth, you should seek immediate medical attention.
Additionally, be cautious not to touch the ink supply port, as this can cause damage. Always handle ink cartridges with the label facing up and avoid touching the valve in the ink supply area. If you notice any damage to the cartridge, it’s crucial to remove it from the printer and dispose of it properly. Leave your old cartridges in a safe place until you are ready to take them to the store for recycling.
Buy a Replacement Cartridge
When buying a replacement cartridge, it’s crucial to research printer compatibility. Choose the right cartridge type based on the make and model of your printer. Finding the best price is essential, but make sure the cartridge is genuine and not a knockoff. Once you have the new cartridge, find the correct cartridge to remove and replace.
Look inside the printer until you are ready to install the new cartridge. Be mindful to avoid getting ink into your eyes or mouth. Ensure that the print head moves to its home position and the printer starts before proceeding. Always follow these steps for a successful cartridge replacement.
Research Printer Compatibility
After identifying the need to replace the cartridge, the next step is to research printer compatibility. Start by checking the printer model number to ensure the replacement cartridge is compatible. Look inside. Some printers have the model number displayed on the inside panel or near the ink faucet. If the model number is not visible, consult the printer’s manual or visit the manufacturer’s website for compatibility information.
Ensure the replacement cartridge is suitable for your specific printer model to avoid any issues later on. This step is crucial to prevent any compatibility issues that could arise from using the wrong cartridge. Be sure to research thoroughly to find the correct and compatible cartridge for your printer.
Choose the Right Cartridge Type
After determining the compatibility of your printer, the next step is to choose the right cartridge type. It’s crucial to select the correct type to ensure optimal performance and print quality. Different printers require specific types of cartridges, so it’s essential to do your research and find the exact match for your printer model.
Consider factors such as color, page yield, and cartridge size to ensure it meets your printing needs. Additionally, take note of any special features or technology that may be required for your printer. Make sure to carefully read the packaging and product specifications to find the best fit for your printer.
Find the Best Price
After researching printer compatibility and choosing the right cartridge type, it’s time to find the best price for your print cartridge. Start by checking online retailers and comparing prices. Look for deals, discounts, or bulk packages until you are ready to purchase. Consider checking local office supply stores or electronics retailers for any in-store promotions or sales.
Don’t forget to factor in shipping costs if ordering online, and consider the convenience of purchasing in person versus waiting for delivery. Keep in mind that prices may vary depending on your location in the U.S., so it’s worth looking around for the best deal. By finding the best price, you can save money while still getting the quality cartridge you need.
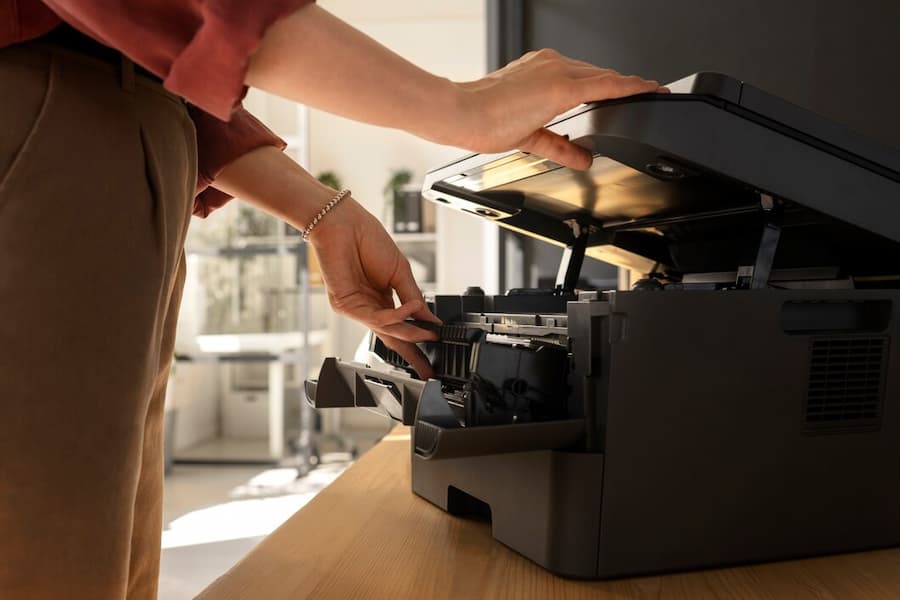
Replace the Cartridge
To prepare the printer for a cartridge replacement, first ensure that the printer is turned on and in a ready state. Next, open the cartridge access door and wait for the print cartridge to move to the center. Carefully remove the old cartridge and store it for later disposal. Install the new cartridge by inserting it into the correct slot until it clicks into place.
Adjust the printer settings as needed to align and calibrate the new cartridge. Be cautious to avoid getting ink into your eyes or mouth. Finally, close the cartridge access door and test the printer with a sample document to ensure the new cartridge is functioning properly.
Prepare the Printer
As we prepare the printer for the new cartridge, it’s important to ensure that the area around the ink supply port is clean and free from any dirt or dust. This will prevent any potential damage to the printer and maintain the reliability of the new cartridge. Remember to keep the ink cartridges out of the reach of children and store them in a safe environment as the printer gets ready for the installation.
Always store the cartridges upside-down to prevent any excess ink from leaking out. Additionally, make sure to protect the ink supply area from dirt and dust by covering it when not in use. Only touch the flat white cable inside the printer when necessary to prevent any bad electrical connections.
Install the Cartridge
After preparing the printer, the next step is to carefully install the cartridge. Begin by opening the cartridge package and removing the protective covering. Take care not to touch the exposed area where the ink gets into your eyes or mouth. Position the cartridge so that the label is facing upwards, then gently slide it into the designated slot until it clicks firmly into place. Ensure that the cartridge is securely installed to prevent any leaks or malfunctions.
Once the cartridge is in position, close the cartridge access door and proceed to adjust the printer settings as needed. Remember to store any spare cartridges for later use in a safe and dry place, away from children.
Adjust Printer Settings
After installing the new cartridge, it is essential to adjust the printer settings for optimal performance. Begin by accessing the printer’s control panel and navigating to the settings menu. Select the option to calibrate the print cartridge to ensure that the ink is distributed evenly. This will prevent any issues with print quality and maintain the longevity of the cartridge. Additionally, you may need to remove an ink cartridge for later use, so be sure to adjust the settings accordingly. It is important to note that adjusting the printer settings will help to optimize the cartridge’s performance and ensure the best possible print results.
Troubleshoot Issues
When troubleshooting print cartridge issues, first ensure the cartridge is properly installed. Check for any visible damage or leaks. Clean the contacts and reseat the cartridge to establish a good connection. If the printer prints poorly, run a cleaning cycle to unclog nozzles. If the printer doesn’t print at all, check for any error messages and perform a reset.
It’s important to handle print cartridges carefully to avoid spills. Bring the cartridge to the store for recycling to prevent environmental harm. Always store cartridges upright to prevent leakage. By following these steps, you can maintain optimal printer performance and avoid potential ink spills.
Printer Is Not Recognizing the Cartridge
If your printer is not recognizing the print cartridge, it could be due to a few different issues. First, ensure that the cartridge is firmly seated in its slot. Sometimes, a loose connection can cause the printer to not recognize the cartridge. If the cartridge is securely in place, check for any dirt or debris on the cartridge or in the cartridge slot.
Even a small amount of dust can interfere with the connection. Finally, make sure that you are using the correct cartridge for your printer model. Using an incompatible cartridge can result in the printer not recognizing it. By addressing these potential issues, you can troubleshoot the problem of the printer not recognizing the print cartridge. If the issue persists, seeking professional assistance may be necessary.
Printer Prints Poorly
After replacing the cartridge, you may encounter issues with the print quality. If the printer prints poorly, it could be due to a clogged print nozzle or low ink levels. To troubleshoot this, start by running a print cartridge cleaning cycle to remove any dried ink that may be obstructing the nozzles. If the issue persists, check the ink levels and replace the cartridge if it’s running low.
Additionally, make sure the printer is installed properly and that there are no bad electrical connections affecting the print quality. Remember, a poorly printed document can be frustrating, so it’s important to address the issue promptly to avoid further complications. And please, if ink gets into your mouth, seek medical attention immediately.
Printer Does Not Print at All
Is your printer failing to produce any printed material at all? Don’t panic! There are a few common causes for this issue that are easily fixable. First, ensure that the print cartridge is securely installed in the designated slot. If the cartridge is not seated properly, the printer will not recognize it, resulting in no printing action.
Next, check the printer’s power source and connectivity to the computer. Faulty electrical connections can also lead to the printer’s inability to print. If these troubleshooting steps do not resolve the issue, it may be necessary to consult a professional technician for further assistance. Remember, addressing these issues promptly will have your printer up and running in no time!
Maintain Your Printer
Regular maintenance of the printer is essential to ensure optimal performance. First, clean the printer regularly to prevent the build-up of dust and debris, which can affect print quality. Store cartridges properly in a cool, dry place to maintain their integrity. Follow manufacturer guidelines for maintenance and handling to prolong the life of the printer and print cartridge.
By adhering to these practices, you can avoid issues such as clogged print heads and poor print quality. Taking these steps will help maintain the printer’s functionality and ensure consistent, high-quality output. Regular maintenance is key to a smoothly running printer system.
Clean the Printer Regularly
Now, let’s move on to the critical task of maintaining your printer. One of the most important aspects of printer maintenance is to clean the printer regularly. Over time, dust and debris can build up inside the printer, leading to poor print quality and potential damage to internal components. To prevent this, it’s essential to clean the printer on a regular basis. Start by powering off the printer and unplugging it from the power source.
Use a soft, lint-free cloth to gently wipe down the exterior of the printer, removing any dust or debris. Next, carefully open the printer and use compressed air to blow out any dust or particles from the interior. Be sure to pay special attention to the print cartridge area, as this is where dust build-up can have the most impact on print quality.
Store Cartridges Properly
After ensuring that your printer is functioning properly, it’s important to consider the proper storage of your print cartridge. Storing your print cartridge in the right way can significantly impact its lifespan and the quality of your prints. When storing your print cartridge, it’s essential to keep it in a cool, dry place.
Avoid exposing it to extreme temperatures, as this can cause damage to the cartridge. Additionally, store the print cartridge in its original packaging to protect it from dust and moisture. By following these guidelines, you can ensure that your print cartridge remains in optimal condition for when you need to use it.
Follow Manufacturer Guidelines
After ensuring your printer is clean and your cartridges are stored properly, it’s essential to follow the manufacturer’s guidelines for optimal performance. Always use the recommended print cartridge to avoid any potential issues. The manufacturer’s guidelines are specifically designed to ensure your printer operates smoothly and efficiently.
From the type of paper to use, to the specific settings for your print jobs, adhering to the manufacturer’s guidelines will help prevent any unnecessary wear and tear on your printer. Additionally, following the guidelines will also help maintain the warranty of your printer, giving you peace of mind in case any issues arise. Always remember, the manufacturer knows their product best, so it’s wise to heed their advice.
Conclusion
In conclusion, it is essential to understand the inner workings of your printer in order to identify when to replace the cartridge. Once you have pinpointed the right time, it is crucial to purchase a replacement cartridge that is compatible with your specific printer model. When replacing the cartridge, follow the manufacturer’s guidelines to ensure a smooth and efficient process. It is also important to troubleshoot any potential issues that may arise after installation in order to maintain the optimal functionality of your printer.
Remember, the key to a well-maintained printer lies in the timely replacement of the cartridge. By following the proper steps and being proactive in addressing any concerns, you can keep your printer running smoothly and produce high-quality prints. So, don’t hesitate to take action when it’s time for a change and replace the cartridge to ensure your printer continues to meet your needs.
For more information and services you can contact us for a free quote and estimation.
- Address: 165 Veterans Way, Warminster, PA 18974
- Email: sales@aispa.us
- Call Us: (215) 999-8445
Related Posts
— How Much Is a Copy Machine? Lease vs. Buy Costs (Updated 2026)
— How Many Pages Does an Ink Cartridge Print? (Updated 2026)