Long Story Short—How to Scan Long Bond Paper Like a Pro
How to scan long bond paper successfully requires disabling duplex scanning, selecting “Long Paper” mode, and supporting the document to prevent jams. Most office scanners handle documents up to 34 inches, while professional models can scan up to 118 inches.
Quick Steps:
- Disable 2-sided scanning and auto-deskew in your scanner software
- Select “Long Paper” from the document size dropdown
- Load one sheet at a time face-down in the ADF
- Support the overhanging portion to prevent paper jams
- Scan at 300 DPI or lower for best results
You know that sinking feeling when you’re trying to scan a legal-plus document and your trusty office scanner just… crops it. Or worse, jams the paper completely.
Long bond paper—anything longer than standard 11-inch letter size—trips up even expensive multifunction printers. The software often defaults to standard sizes, cutting off crucial information. The hardware struggles with the extra length, causing skewed scans or paper jams.
The main culprits? Most scanning software hides the long-paper option until you disable conflicting features like duplex scanning and auto-deskew. Many office managers don’t realize their scanner can handle longer documents—they just need to know which settings to change.
Whether you’re digitizing legal contracts, architectural drawings, or oversized forms, getting a clean scan shouldn’t require a computer science degree.

What Counts as “Long Bond Paper” and Why It’s Tricky
Long bond paper typically measures 8.5 × 13 to 15 inches, though the term gets thrown around for anything exceeding standard letter size. We’re talking about legal-plus documents, oversized forms, continuous-feed reports, and those architectural drawings that seem to go on forever.
The real challenge starts when you hit the technical limits. Most scanners can handle documents up to 3,000 mm (118 inches) on 64-bit systems, but only 863 mm (34 inches) on 32-bit operating systems. That’s a massive difference that catches people off guard.
Why scanning gets tricky:
- Resolution caps: Long paper scanning only works at resolutions below 300 × 300 DPI. Try scanning at higher quality, and your maximum length drops to just 360 mm (14 inches)
- Feed style limitations: Automatic document feeders (ADF) handle long paper differently than flatbeds, often requiring special alignment
- Cropping risk: Scanner software defaults to standard sizes, chopping off anything beyond 11 or 14 inches
- Paper jam potential: Longer documents have more surface area to catch, fold, or skew during feeding
Typical Sizes & Specs for How to Scan Long Bond Paper
Most long bond paper falls into these categories:
- Legal-plus: 8.5 × 13-15 inches (common for contracts and legal documents)
- Tabloid: 11 × 17 inches (architectural drawings, spreadsheets)
- Continuous forms: Variable lengths up to several feet (reports, receipts)
- Custom sizes: Anything between 14-118 inches depending on your scanner
The paper weight matters too. Standard 20-24 lb bond paper feeds more reliably than heavier cardstock. Anything over 32 lb GSM weight increases your jam risk significantly.
For businesses handling various document types regularly, understanding these specifications helps you choose the right equipment. Our guide on Types of Paper for Printing covers weight specifications and compatibility in detail.
Picking the Right Gear & Software Settings
Not all scanners handle long documents equally. We’ve seen too many offices invest in expensive equipment only to find it can’t scan their most important documents properly.
Scanner classes break down like this:
- Entry-level desktop scanners: Usually max out at 34 inches, perfect for legal documents
- Office multifunction printers: Mid-range models handle up to 118 inches with proper settings
- Production scanners: Professional units can scan up to 215 inches (5461 mm) continuously
The key difference? ADF versus flatbed scanning. Flatbed scanners require you to manually position and potentially stitch segments together. ADF scanners can handle the full length automatically—if you configure them correctly.
Critical software settings:
- Long-paper mode: Hidden until you disable conflicting features
- Simplex only: Two-sided scanning doesn’t work with extended lengths
- Resolution ≤300 DPI: Higher resolutions reduce maximum scannable length
- OCR limits: Text recognition works best at 300 DPI for long documents
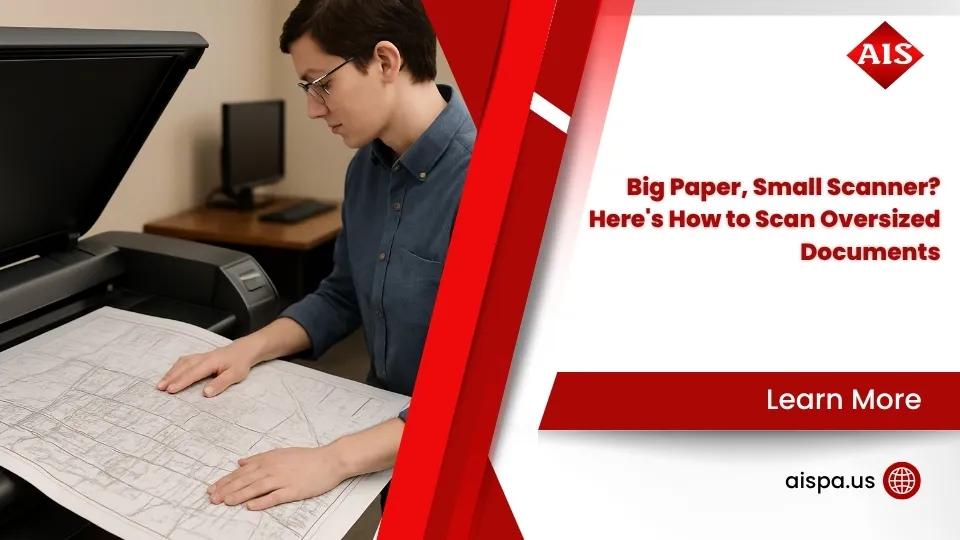
For businesses needing to scan architectural drawings or engineering plans regularly, Wide Format Printers often include advanced scanning capabilities that handle oversized documents more reliably.
| Feature | ADF Scanner | Flatbed Scanner |
|---|---|---|
| Maximum Length | Up to 215 inches | Limited by glass size |
| Setup Time | Quick | Requires repositioning |
| Alignment | Automatic guides | Manual positioning |
| Batch Scanning | Yes | No |
| Jam Risk | Higher | Lower |
| Image Quality | Good | Excellent |
Maximum Lengths on Popular Categories
Entry-level scanners (up to 34 inches): Most desktop document scanners and basic multifunction printers fall here. They’re perfect for legal documents and standard business forms but struggle with anything longer.
Office scanners (up to 118 inches): Mid-range business scanners with proper software configuration. These handle most architectural drawings and engineering documents. The 118-inch limit applies to 64-bit systems with automatic image quality settings.
Production scanners (up to 215 inches): Professional scanning equipment designed for high-volume document processing. These units often include advanced paper handling and automatic length detection.
Understanding these categories helps you set realistic expectations. If you’re regularly scanning documents longer than 34 inches, entry-level equipment won’t cut it—regardless of the marketing claims.
Step-by-Step: How to Scan Long Bond Paper Without Losing an Inch

Here’s the foolproof method we’ve developed after helping countless offices solve their long-paper scanning challenges:
Pre-scan preparation:
- Power on your scanner and ensure it’s connected properly
- Open the ADF cover and extend the paper support tray
- Adjust paper guides to match your document width exactly
- Check paper condition – ensure it’s flat and dry
Software configuration:
- Launch your scanner software (ControlCenter, Epson Scan, etc.)
- Disable duplex scanning – this is crucial for long-paper mode
- Turn off auto-deskew – prevents unwanted cropping
- Select “Long Paper” from the document size dropdown
- Set resolution to 300 DPI or lower – higher resolutions won’t work
- Choose your file format – PDF works best for archiving
Physical scanning:
- Load one sheet at a time face-down, top edge first
- Support the overhanging portion with your hand or a support tray
- Press scan and keep the document steady
- Wait for completion before removing the paper
The most common mistake? Loading multiple sheets. Long-paper mode only works with single documents. Trying to batch scan will cause jams or missed pages.
For additional scanning guidance, check our comprehensive How to Scan a Paper on a Printer tutorial.
Software Walk-Through for How to Scan Long Bond Paper
Creating a custom profile saves time:
Most scanner software lets you save long-paper settings as a preset. We recommend creating a profile called “Long Documents” with these settings:
- Document size: Long Paper
- Resolution: 300 DPI
- Color mode: Auto-detect or grayscale
- File format: PDF with OCR enabled
- Duplex: Disabled
- Auto-deskew: Disabled
The resolution dropdown matters more than you think. At 300 DPI, you can scan up to 118 inches. Drop to 200 DPI, and some scanners extend to 122 inches. But go higher than 300 DPI, and your maximum length plummets to just 14 inches.
File naming conventions help with organization. Set up automatic naming with date stamps and document type identifiers. Long documents often contain critical information, so clear naming prevents confusion later.
OCR toggle considerations: While optical character recognition makes documents searchable, it requires consistent lighting and clean text. For handwritten or low-quality originals, disable OCR to speed up scanning.
Hardware Walk-Through for How to Scan Long Bond Paper
Physical setup determines success:
The paper guides need precise alignment. Too tight, and the document won’t feed smoothly. Too loose, and you’ll get skewed scans or jams. We position guides so they just touch the paper edges without applying pressure.
Supporting the overhang prevents disasters. Documents longer than your scanner’s input tray need support. Use a cardboard box, additional table, or have someone hold the paper lightly. Never let long documents hang unsupported—they’ll fold or tear.
The exit tray matters too. Extend it fully and ensure nothing blocks the paper path. Long documents need clear space to exit without folding back on themselves.
Manual feed option: Some scanners offer manual feed mode for delicate or oversized documents. This slows down the process but gives you complete control over paper movement.
Plan B: When Your Scanner Won’t Cooperate

Sometimes your scanner simply can’t handle the length, or the document is too valuable to risk jamming. That’s when segment scanning and digital stitching save the day.
Segment scanning works like this:
- Scan the document in overlapping sections (20% overlap minimum)
- Maintain consistent lighting and positioning
- Use identical resolution and color settings for each segment
- Stitch segments together using specialized software
Free stitching tools that actually work:
- Microsoft Image Composite Editor – Excellent for automatic alignment
- Hugin – Open-source panorama stitching with manual control
- GIMP – Free image editor with layer alignment tools
- Adobe Acrobat – Built-in page combining features
Mobile app capture has improved dramatically. Apps like Adobe Scan and Microsoft Lens can capture long documents in segments and auto-stitch them. The quality won’t match a dedicated scanner, but it’s perfect for quick digitization.
Cloud stitching services handle the heavy lifting automatically. Upload your segments, and the service returns a seamless composite. Useful for high-volume processing or when local software struggles with alignment.
Flatbed & Stitching Method
The overlap technique: Position your document so each scan overlaps the previous one by at least 20%. This gives stitching software enough reference points for accurate alignment. Mark the overlap zones lightly with removable tape to maintain consistency.
Color balance matters more than you’d expect. Flatbed scanners can have slight color variations across the glass surface. Use the same color correction settings for each segment to ensure seamless blending.
Export format considerations:
- TIFF files preserve maximum quality for stitching
- High-resolution JPEGs work for most business documents
- PNG format handles line art and text best
Assembling the final PDF: Most stitching software exports composite images. Use Adobe Acrobat or similar tools to convert the final image into a searchable PDF with proper metadata.
Rolling Feed & Banner Scanning
Some production scanners support continuous roll media, perfect for extremely long documents. This method works best for uniform-width materials like architectural drawings or continuous-form reports.
Roll media setup:
- Mount the roll securely to prevent unwinding
- Set continuous mode in scanner software
- Calibrate length detection for accurate measurements
- Monitor the feed to prevent jams or tears
Length calibration ensures accuracy. Most scanners need manual calibration for roll media. Scan a known length first, then adjust the software settings to match actual measurements.
Troubleshooting & Best Practices

Even with perfect setup, long documents can cause problems. Here’s how we handle the most common issues:
Paper curl prevention:
- Store documents flat before scanning
- Use humidity control – 45-55% relative humidity works best
- Warm up the scanner – cold rollers increase jam risk
- Clean rollers regularly with isopropyl alcohol
Driver updates matter more than you think. Outdated scanner drivers often limit long-paper functionality. Check for updates quarterly, especially after operating system changes.
Resolution versus file size balance:
- 300 DPI: Best quality for archival documents
- 200 DPI: Good compromise for everyday use
- 150 DPI: Acceptable for text-only documents
- 600 DPI: Only works with documents under 34 inches
For comprehensive scanning guidance across different document types, our How to Scan a Paper on a Printer guide covers additional troubleshooting scenarios.
Quick Fixes if Scan Gets Cut Off or Skewed
Disable auto-crop immediately. This feature assumes standard paper sizes and will chop off anything beyond its expectations. Look for “auto-crop,” “auto-trim,” or “edge detection” settings and turn them off.
Increase margin settings if available. Some scanners let you add buffer space around detected documents. A 0.5-inch margin prevents edge cutting on borderline-length documents.
Check firmware updates. Scanner manufacturers regularly release firmware updates that improve long-paper handling. These updates often fix length detection bugs and improve feed reliability.
Recalibrate sensors if your scanner supports it. Document sensors can drift over time, causing premature cutoff or skewed detection. Most professional scanners include calibration routines in their maintenance menus.
Pro Tips to Keep Every Pixel Sharp
The ≤300 DPI rule is non-negotiable. Higher resolutions physically cannot scan long documents on most equipment. The scanner’s memory and processing power limit how much data it can handle in a single pass.
Simplex only – no exceptions. Two-sided scanning requires the document to flip and re-feed, which doesn’t work with extended lengths. Plan for single-sided scanning and manually flip documents if needed.
Support the document throughout the process. Don’t just support the overhang—guide the entire document gently as it feeds. This prevents accordion folds and ensures smooth paper movement.
Name files logically from the start. Use descriptive names with date stamps: “ContractABCCorp2024-01-15LongBond.pdf” beats “Scan001.pdf” every time.

Frequently Asked Questions about Long Bond Paper Scanning
Why does my scan stop at 34 inches?
This happens for several reasons. First, check if you’re running 32-bit scanner software—it’s limited to 863 mm (34 inches) maximum. Upgrade to 64-bit software to open up the full 3,000 mm (118 inches) capability.
Second, verify your resolution settings. Scanning above 300 DPI automatically reduces maximum length to just 360 mm (14 inches). Lower your resolution to 300 DPI or below.
Finally, ensure you’ve disabled duplex scanning and auto-deskew. These features conflict with long-paper mode and force the scanner to use standard size limits.
Can I use duplex mode on long bond paper?
No, duplex (two-sided) scanning doesn’t work with long bond paper. The paper flipping mechanism can’t handle documents longer than standard sizes. You’ll need to scan each side separately if you need both sides digitized.
The technical limitation comes from the paper path design. Long documents would fold or jam during the flip process. Even professional scanners that support duplex mode disable it automatically when you select long-paper settings.
What’s the best file format for archiving long documents?
PDF with OCR (Optical Character Recognition) provides the best balance of quality, searchability, and compatibility. The text remains searchable while preserving the document’s visual appearance.
For maximum quality preservation, use PDF/A-1b format—it’s designed for long-term archival storage and ensures the document will remain readable decades from now.
TIFF format works well if you need to edit or improve the scanned image later, but file sizes are significantly larger than PDF.
Conclusion
Scanning long bond paper doesn’t have to be a nightmare. The key is understanding your equipment’s capabilities and configuring the software correctly. Remember: disable duplex scanning, turn off auto-deskew, select long-paper mode, and support the document throughout the process.
At Associated Imaging Solutions, we’ve helped businesses across Pennsylvania—from Philadelphia to Pittsburgh, Erie to York—solve their document scanning challenges. Our local expertise combined with advanced technology means you get personalized solutions that actually work.
Whether you’re in our Altoona, Bethlehem, or Scranton locations, we understand the unique document handling needs of Pennsylvania businesses. Legal firms need reliable contract scanning, architectural offices require blueprint digitization, and manufacturing companies must archive technical drawings.
The bottom line: Don’t let long documents slow down your business. With the right equipment and proper setup, how to scan long bond paper becomes just another routine office task. Our managed print services include scanner optimization and staff training to ensure your team can handle any document size confidently.
For businesses needing to scan architectural drawings or engineering plans regularly, our Large Format Printers often include advanced scanning capabilities that handle oversized documents more reliably than standard office equipment.
Ready to upgrade your document scanning capabilities? Contact Associated Imaging Solutions for a personalized consultation. We’ll assess your specific needs and recommend equipment that handles your longest documents without breaking a sweat.
