How to Scan a Paper with These 5 Easy Steps
AI Overview:
This comprehensive guide explores how digitizing paper documents can transform any office into a clutter-free, efficient workspace. It simplifies the process of turning physical papers into organized, searchable digital files—helping businesses save space, streamline workflows, and enhance accessibility.
From Paper Piles to Digital Files: Your Scanning Journey Starts Here
Learning how to scan a paper document is a simple skill that can revolutionize your office by converting physical papers into organized, searchable digital files. No more cluttered desks or lost receipts—just clean, efficient digital storage that saves time and ensures important information is always at your fingertips.
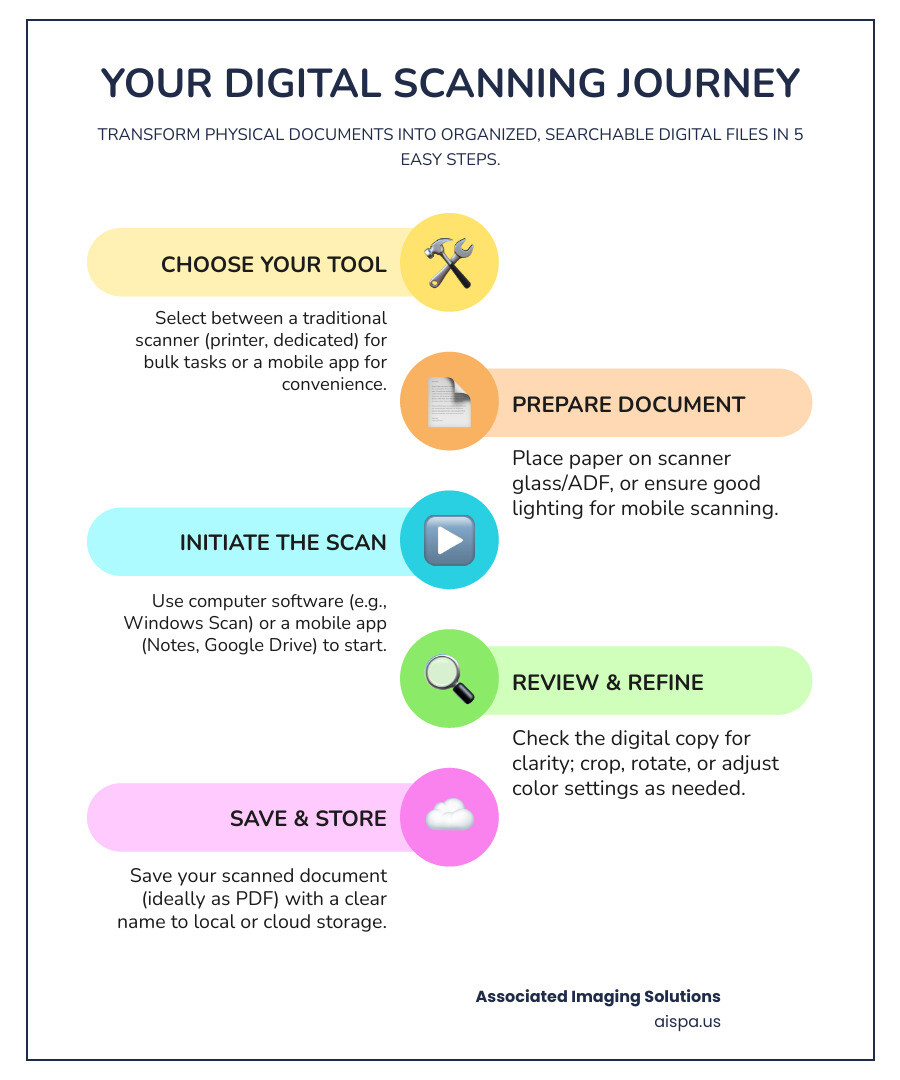
Here’s a quick overview of how to get your documents digitized:
- Choose Your Tool: Decide between a traditional scanner for bulk tasks or a mobile scanning app for convenience.
- Prepare Your Document: Place your paper flat on the scanner glass or use the automatic document feeder. For mobile scanning, ensure good lighting and a flat surface.
- Initiate the Scan: Use your computer’s scanning software or a mobile app and tap the scan button.
- Review and Refine: Check the digital copy. Crop, rotate, or adjust color settings if needed.
- Save and Store: Save the scanned document as a PDF with a clear name and store it in a logical folder or in the cloud.
Ready to transform your document management? Let’s dive deeper.
For a busy office manager in Philadelphia, mastering how to scan a paper is a game-changer. It allows you to convert physical documents like receipts, contracts, and invoices into digital formats. This not only frees up physical space but also makes these documents easily searchable, shareable, and secure, giving your paper documents a digital superpower.
Choosing Your Scanning Method: From Printers to Phones
The best way to scan a paper document depends on your needs. Are you processing a high volume of invoices, or just capturing a single receipt on the go? Let’s break down the main options.
| Feature | Traditional Scanners (e.g., All-in-One Printers) | Mobile Scanning Apps (e.g., Notes, Google Drive) |
|---|---|---|
| Quality | Often higher, especially for photos and graphics | Very good for documents, continually improving |
| Speed | Fast, especially with Automatic Document Feeders | Varies; quick for single pages, slower for many |
| Portability | Low; fixed to a desk | High; fits in your pocket |
| Cost | Initial investment for hardware | Often free or low-cost (app subscriptions) |
| Multi-page handling | Excellent with ADF | Good, many apps allow combining pages |
Traditional Scanners and All-in-One Printers
For a busy office or high-volume scanning, a traditional scanner or all-in-one printer is your best choice. These devices produce high-quality scans, which is crucial for detailed graphics or photos.
Many office devices include an Automatic Document Feeder (ADF), allowing you to load a stack of pages for fast, automated processing. Network scanners are also valuable in office settings, connecting via USB or Wi-Fi and using standard TWAIN and WIA drivers to ensure compatibility with your software.
To optimize your setup, explore the Office Document Solutions: Benefits. For a step-by-step guide on using your existing equipment, see our article on How to Scan a Paper on a Printer.
Mobile Scanning Apps
For those constantly on the move, mobile scanning apps are a perfect solution. Your smartphone is a powerful and convenient scanning tool that is almost always with you. Most apps are cost-effective (often free), with the native iPhone Notes app and the Google Drive app for Android offering robust features.
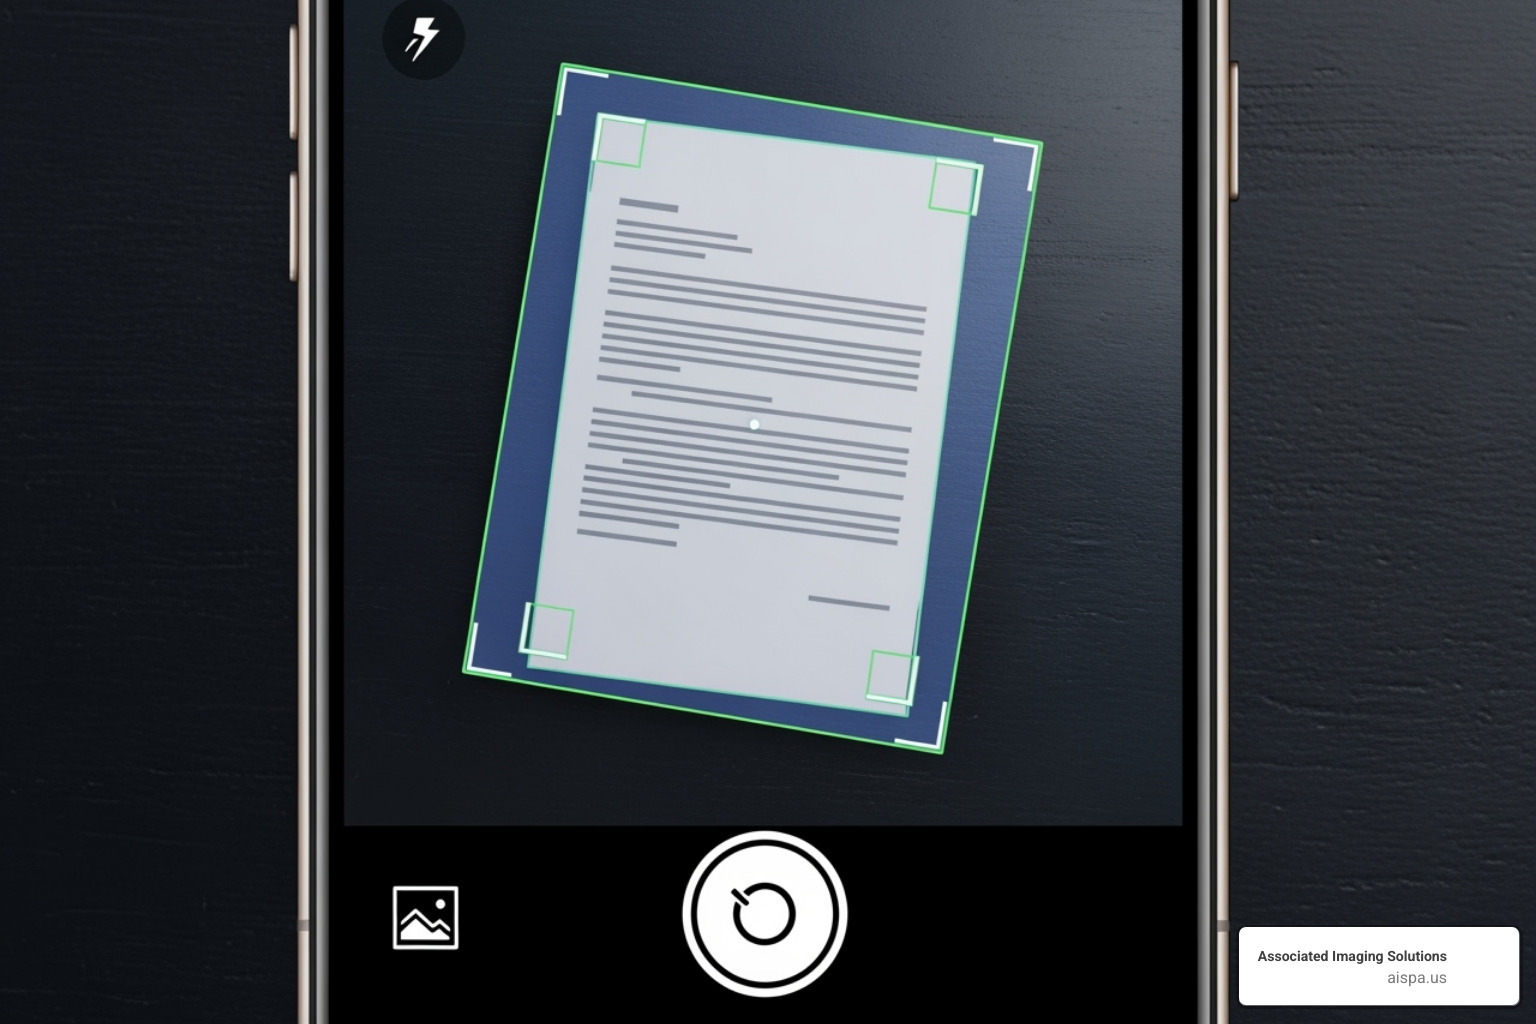
On-the-go scanning allows you to instantly capture and organize receipts, contracts, and other documents. Modern smartphone cameras provide impressive image quality, and apps add features like automatic edge detection, perspective correction, and direct PDF creation.

Mobile scanning is simple: open an app, point your camera, and you have a digital document ready to share or store, without needing complex software or drivers.
How to Scan a Paper Using a Printer or All-in-One Device
For reliable, high-quality results, especially with multi-page documents, using a printer or scanner connected to your computer is the best method. The process for how to scan a paper is straightforward on both Windows and Mac systems.
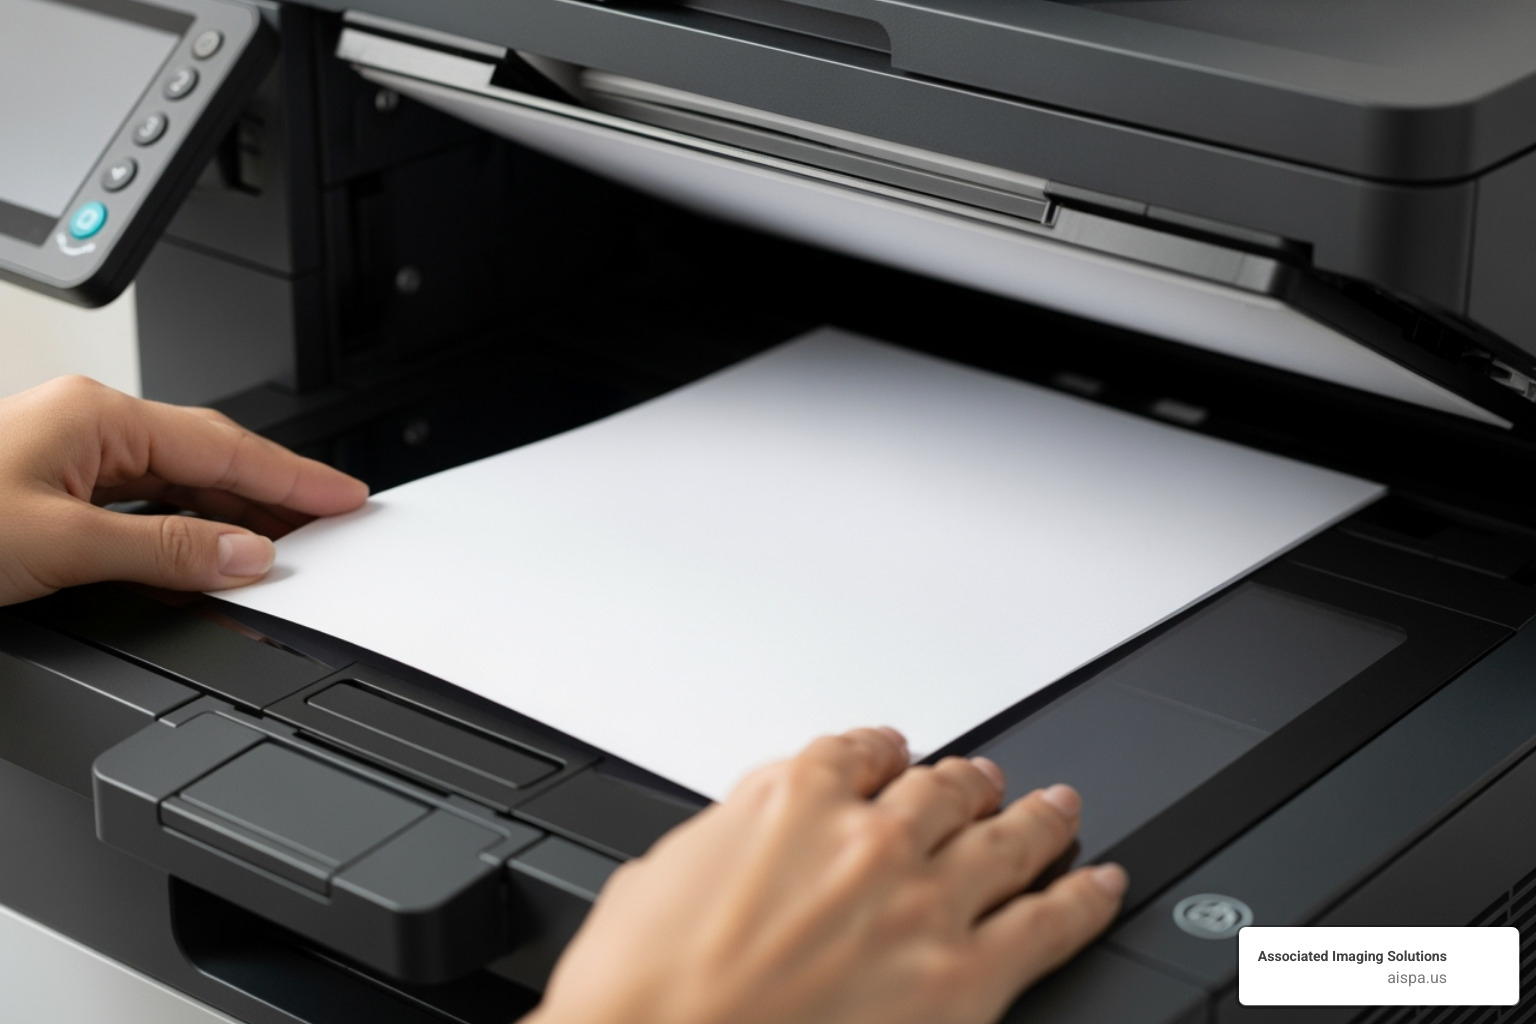
Ensure your scanner is connected to your computer via USB cable or your wireless network. While many scanners have proprietary software, both Windows and macOS include excellent built-in tools. For tips on saving scans directly to your desktop, see our guide on How to Scan a Document to Desktop: Easy Steps.
Step-by-Step: How to scan a paper on Windows
Windows offers two primary built-in scanning utilities.
Method 1: Using the Windows Scan App
The free Windows Scan app (available from the Microsoft Store) is a user-friendly tool for scanning documents into image files like JPEG, PNG, or bitmap.
- Prepare Document: Place your document on the scanner’s flatbed or in the Automatic Document Feeder (ADF).
- Open App: Search for and open the Windows Scan app.
- Select Scanner: Choose your scanner from the dropdown menu.
- Adjust Settings: Select the Source (Flatbed or Document Feeder), File type, and Color mode. A Resolution of 300 dpi is standard for documents, while 600 dpi is better for photos.
- Scan and Save: Click “Scan.” After scanning, review, crop, or rotate the image, then click “Save” to choose a location.
Method 2: Using Windows Fax and Scan (for PDF output)
For more control and to create PDFs, use the built-in Windows Fax and Scan utility.
- Prepare Document: Place the document on the scanner or in the ADF.
- Open App: Search for and open “Windows Fax and Scan.”
- Start Scan: Click “New Scan” in the top-left corner and ensure your scanner is selected.
- Adjust Settings & Scan: Choose a Profile (e.g., “Documents”), Source, and Color format, then click “Scan.”
- Save as PDF: Once the scan appears, right-click it and select “Print.” In the print dialog, choose “Microsoft Print to PDF” as the printer. Click “Print” again, name your file, and save it as a PDF.
Step-by-Step: How to scan a paper on Mac
Mac users can scan using the built-in Image Capture app, accessed through System Settings.
- Prepare Document: Place the document on the scanner’s glass or in the ADF.
- Open Scanner Settings: Go to the Apple menu > System Settings > Printers & Scanners. Select your scanner from the list and click “Open Scanner…” to launch Image Capture.
- Configure Settings: In Image Capture, set the Mode (e.g., “Text”), Resolution (300 dpi for documents), and Size. Choose a save location under “Scan To.”
- Select PDF Format: Under Format, select “PDF.” For multiple pages, check the box for “Combine into single document.”
- Scan: Click the “Scan” button. If combining pages, the app will prompt you to add subsequent pages. Click “Done” after the last page to save the combined PDF.
Scanning on the Go: Using Your Smartphone (iPhone & Android)
Smartphones have become excellent mobile scanners, offering best portability and instant sharing. This is perfect for capturing receipts, business cards, or signed documents anywhere, anytime. Mobile scanning is a quick, cost-effective way to digitize paper and keep your files organized.
Scanning Documents on an iPhone or iPad
Apple integrates scanning features directly into its native apps, making it simple to digitize documents.
Method 1: Using the Notes App
The Notes app is one of the easiest ways to scan a paper on an iOS device and even allows you to add a signature.
- Open the Notes app and create or open a note.
- Tap the camera icon and choose “Scan Documents.”
- Position your device over the document. The app will automatically detect and capture the scan. You can also tap the shutter button manually.
- Adjust the corners if needed and tap “Keep Scan.” Repeat for additional pages.
- Tap “Save” to embed the PDF into your note.
- To add a signature, tap the saved scan, tap the “Markup” icon, tap the “+” button, and select “Signature.”
Method 2: Using the Files App
Use the Files app to save scans directly to a specific folder in iCloud Drive or on your device.
- Open the “Files” app and steer to your desired save location.
- Tap the three dots (More button) in the top-right corner and select “Scan Documents.”
- Scan the document as you would in the Notes app.
- Tap “Save,” and the PDF will be placed directly into your chosen folder.
Scanning Documents on an Android Device
Android users can easily scan documents using the Google Drive app, which integrates seamlessly with cloud storage.
- Open the “Google Drive” app and tap the “+” (plus) icon.
- Select “Scan.”
- Position your phone over the document and tap the shutter button.
- After capturing, use the icons to crop, rotate, or adjust the color mode (e.g., Black & white, Grayscale).
- Tap the “+” icon to add more pages to the same document.
- When finished, tap “Done.” Name the file, choose a save folder in Google Drive, and your searchable PDF will be saved.
Pro Tips for High-Quality Scans and Organization
Beyond the basics of how to scan a paper, a few pro tips can ensure your digital files are clear, useful, and easy to find. Strong document management is crucial for business efficiency. For a deeper look, check out our guide on Document Management Solutions.
Ensuring High-Quality Scans
The quality of your scan determines its usefulness. For top-notch digital copies, follow these tips:
- Use the Right Resolution: For most text documents, 300 dpi (dots per inch) is perfect for sharp, readable text. For photos or detailed graphics, use 600 dpi or higher.
- Ensure Good Lighting: Scan in even light, avoiding harsh shadows or glare that can obscure details.
- Keep Documents Flat: Lay the paper as flat as possible to avoid distortions from creases or folds. When using a phone, a contrasting background helps the app detect edges.
- Clean Your Equipment: Regularly wipe your scanner glass or phone lens to prevent smudges and dust from appearing on your scans.
For tips on scanning non-standard sizes, see our guide on How to Scan Long Bond Paper Easily.
Scanning Multiple Pages into One PDF
Combining multi-page documents like contracts into a single PDF simplifies management. If your scanner has an Automatic Document Feeder (ADF), load your stack of papers, select the feeder as the source, and the software will typically combine them into one PDF automatically.
Mobile scanning apps are also great for this. After scanning the first page, look for a “+” or “add page” button to continue scanning. You can then reorder or delete pages before saving the final multi-page PDF. If your scans are saved as separate files, use a PDF editor or an online tool to merge them. For large-scale projects, our article on How to Scan Big Documents offers more strategies.
Understanding OCR for Searchable Documents
Optical Character Recognition (OCR) is a technology that converts text within a scanned image into searchable, machine-readable data. This makes your digital invoices, contracts, and reports “smart” documents. Many scanning apps, like Adobe Scan, perform OCR automatically, creating a searchable text layer within the PDF.
This allows you to find documents by searching for keywords inside them. Advanced OCR tools can even convert a scan into a fully editable text document (like a Microsoft Word file). To learn more, read our guide on How to Convert Scanned Documents to Text.
Organizing and Storing Your Digital Files
Good organization prevents digital clutter. Follow these best practices:
- Use Clear File Naming Conventions: A consistent naming system like
[Date]-[DocumentType]-[Description].pdf(e.g.,2023-10-26-Receipt-OfficeSupplies.pdf) makes files easy to find. - Create a Logical Folder Structure: Organize files into categories like “Financial,” “Contracts,” and “Client Files.”
- Use Cloud Storage: Services like Google Drive or Dropbox provide secure backup, access from any device, and easy sharing.
- Maintain a Local Backup: For critical documents, keep a copy on an external hard drive as an extra safety measure.
Associated Imaging Solutions offers professional Document Scanning and Archiving and Document Management Software Solutions to help businesses manage digital assets efficiently.
Frequently Asked Questions about Scanning Documents
Here are answers to some of the most common questions we hear from clients in Philadelphia and beyond about digitizing their documents.
How do I convert a scanned image (like a JPG) into a PDF?
If your scan saved as an image file (like a JPG or PNG), you can easily convert it to a PDF. The simplest method is your computer's built-in "Print to PDF" function. On Windows, open the image, go to Print (Ctrl+P), and select "Microsoft Print to PDF" as the printer. On a Mac, open the image in Preview, go to File > Print, and select "Save as PDF" from the PDF dropdown menu.
Alternatively, many free online converter tools can do the job, though be mindful of privacy with sensitive documents. The best practice is to select PDF as your output format in your scanning software from the start.
What is the best resolution for scanning a document?
The best resolution, measured in DPI (dots per inch), depends on the document type.
For text-based documents (letters, invoices, contracts), 300 DPI is the standard. It ensures clear, legible text, keeps file sizes manageable, and works well for Optical Character Recognition (OCR).
For photos, artwork, or documents with fine detail, use 600 DPI or higher to capture all the nuances of the original.
Scanning below 300 DPI is not recommended, as it can result in blurry or pixelated text if printed.
Can I edit the text in a document after I scan it?
Yes, you can edit the text in a scanned document by using Optical Character Recognition (OCR) technology. When you scan a paper, you create an image. OCR software analyzes this image, recognizes the characters, and converts them into editable text.
Many modern scanning applications and software like Adobe Acrobat have built-in OCR. After processing, the software creates a searchable text layer or converts the file into a fully editable format like a Word document. The accuracy depends on the scan quality, so a clear, 300 DPI scan is recommended. For more details, see our guide on How to Convert Scanned Documents to Text.
Conclusion
Learning how to scan a paper document is an essential skill that can transform your workflow. Whether you use a traditional scanner for high-volume, high-quality results or a smartphone for on-the-go convenience, digitizing documents is more accessible than ever.
By combining good scanning practices—like using the proper resolution and OCR technology—with smart organization, you create a searchable digital library that saves time and boosts efficiency. For businesses, this is a critical step in modern document management.
Investing in professional equipment with advanced features like automatic document feeders and superior image quality can dramatically speed up your workflow. At Associated Imaging Solutions, we understand that Philadelphia businesses need reliable document solutions.
Based in Philadelphia, we’ve helped countless local businesses streamline their processes with high-quality copiers and printers. Our blend of local expertise and global technology standards provides personalized service with cutting-edge equipment. Whether you need copier rentals, repairs, or managed print services, we’re here to help you take control of your documents.
Ready to transform your document management? Let’s work together to find the perfect solution for your business needs.


