Shrink It Down! Compressing Files with Your Sharp Printer

April 24, 2025
 0 views
 0 comments
How to compress files on a sharp printer is a valuable skill for any office manager looking to streamline document workflows and save valuable storage space. Here’s a quick overview of the process:
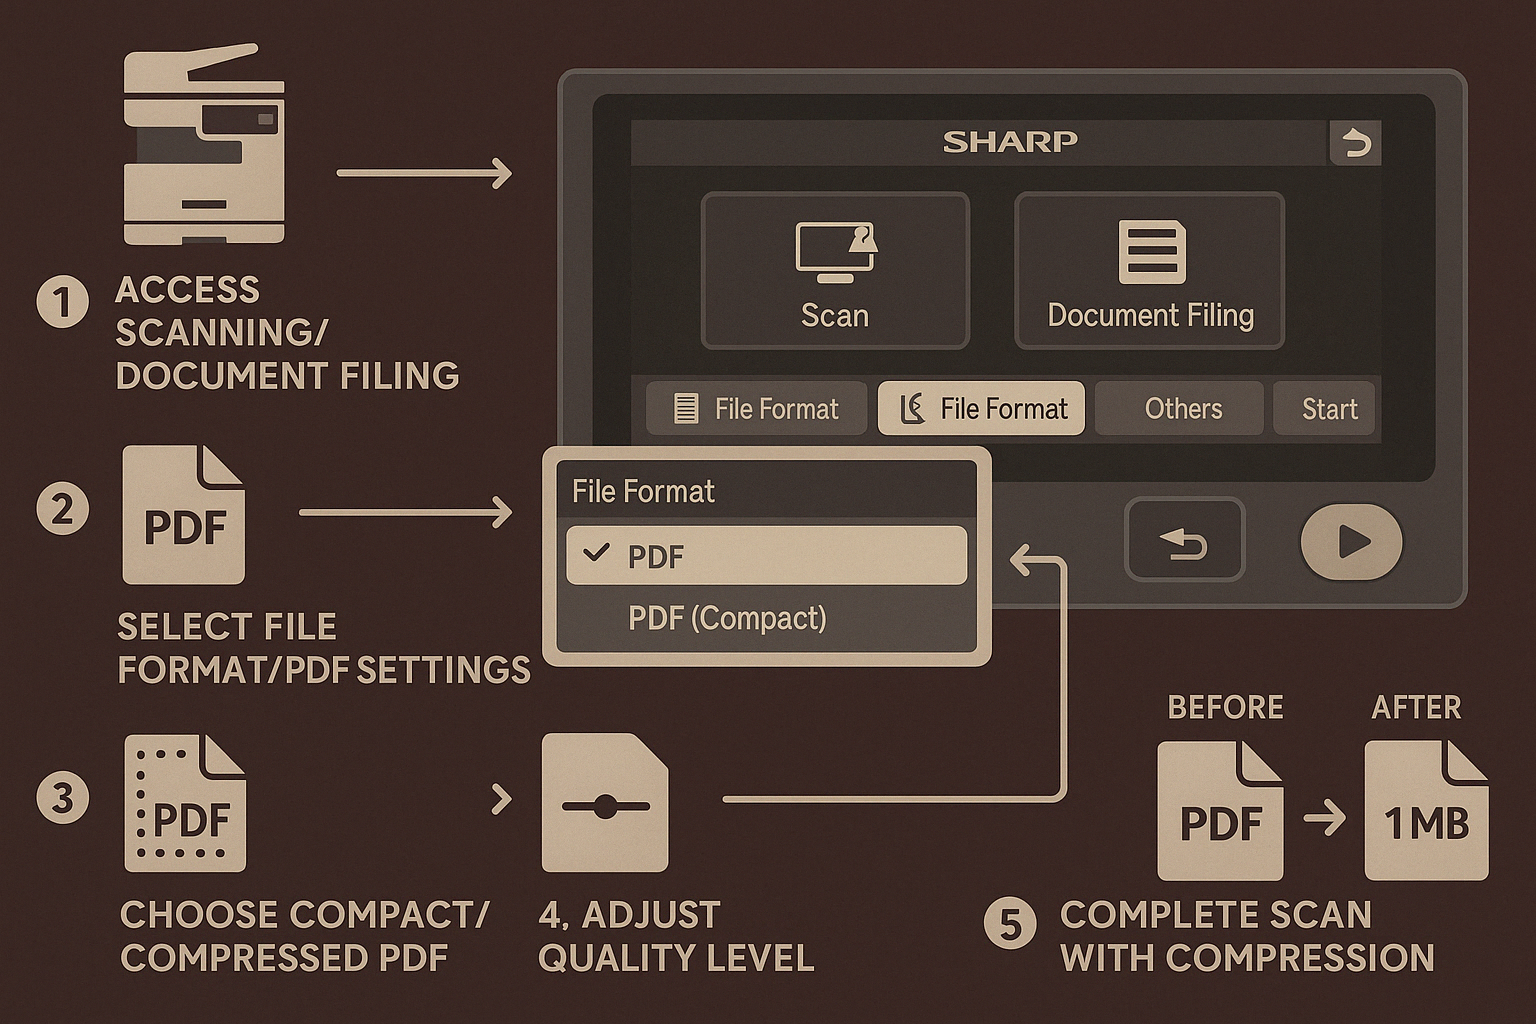
- Access the scanning or document filing feature on your Sharp printer’s control panel
- Select “File Format” or “PDF Settings” in the scanning options
- Choose “Compact PDF” or “Compressed PDF” from the available formats
- Adjust compression quality level based on your needs
- Complete your scan or file processing with the compression settings applied
Sharp printers offer several effective ways to reduce file sizes directly from the machine, saving you time and digital storage space. Whether you’re scanning documents for email distribution or storing files on your network, compression helps manage your digital documents more efficiently.
The built-in compression features on Sharp multifunction printers can significantly reduce file sizes without major quality loss, especially for text-heavy documents. This functionality is particularly useful for businesses handling large volumes of documents daily.
Modern Sharp printers, including the latest 2025 models in the MX series like the MX-2651 and MX-6071, come equipped with document filing features that allow you to not only compress files but also store them on the printer’s hard drive for easy access later.
Similar topics to how to compress files on a sharp printer:
Understanding File Compression on Sharp Printers
File compression is like digital magic that shrinks your documents down to more manageable sizes without sacrificing what makes them useful. Sharp printers come with this capability built right into their systems, making it incredibly convenient to create smaller files at the touch of a button.
When you’re working with a Sharp printer, you have two main ways to compress your files:
Compact PDF Technology is a standout feature specifically designed for scanned documents. This clever technology creates PDF files that take up significantly less space than standard PDFs while keeping text clear and readable. It’s perfect for archiving important documents without filling up your storage.
The second method is Bitmap Image Compression, which works wonderfully for print jobs containing images. Your Sharp printer can compress image data using formats like JPEG, RLE (Run-Length Encoding), or Delta Row, depending on which printer driver you’re using.
Behind the scenes, the compression function operates at the printer driver’s language level. If you’re using Windows, you’ll find this feature available when your printer is set up with PCL6 or PostScript protocols. It’s worth noting that JPEG compression only works when you’re using PostScript.
Here at Associated Imaging Solutions, we’ve watched businesses throughout Pennsylvania transform their document management efficiency by taking advantage of these compression features. One of our clients in Harrisburg – a law firm with mountains of paperwork – managed to reduce their digital storage needs by nearly 40% in 2025 just by properly configuring the compression settings on their Sharp MX series printers.
What makes how to compress files on a Sharp printer particularly user-friendly is the flexibility of where you can adjust these settings. You can configure compression either directly at the printer’s control panel while scanning, or through the printer driver on your computer when printing. This means you can choose whichever method fits best with your team’s workflow.
The compression settings are particularly valuable when you’re dealing with high-resolution scans or graphics-heavy documents that would otherwise create enormous files. By finding the right balance between file size and quality, you can make document sharing and storage much more efficient without compromising on readability.
How to Compress Files on a Sharp Printer
The process of compressing files on your Sharp printer is straightforward once you know where to look. Whether you’re scanning new documents or working with existing files, your Sharp printer offers intuitive options to reduce file sizes without sacrificing too much quality.
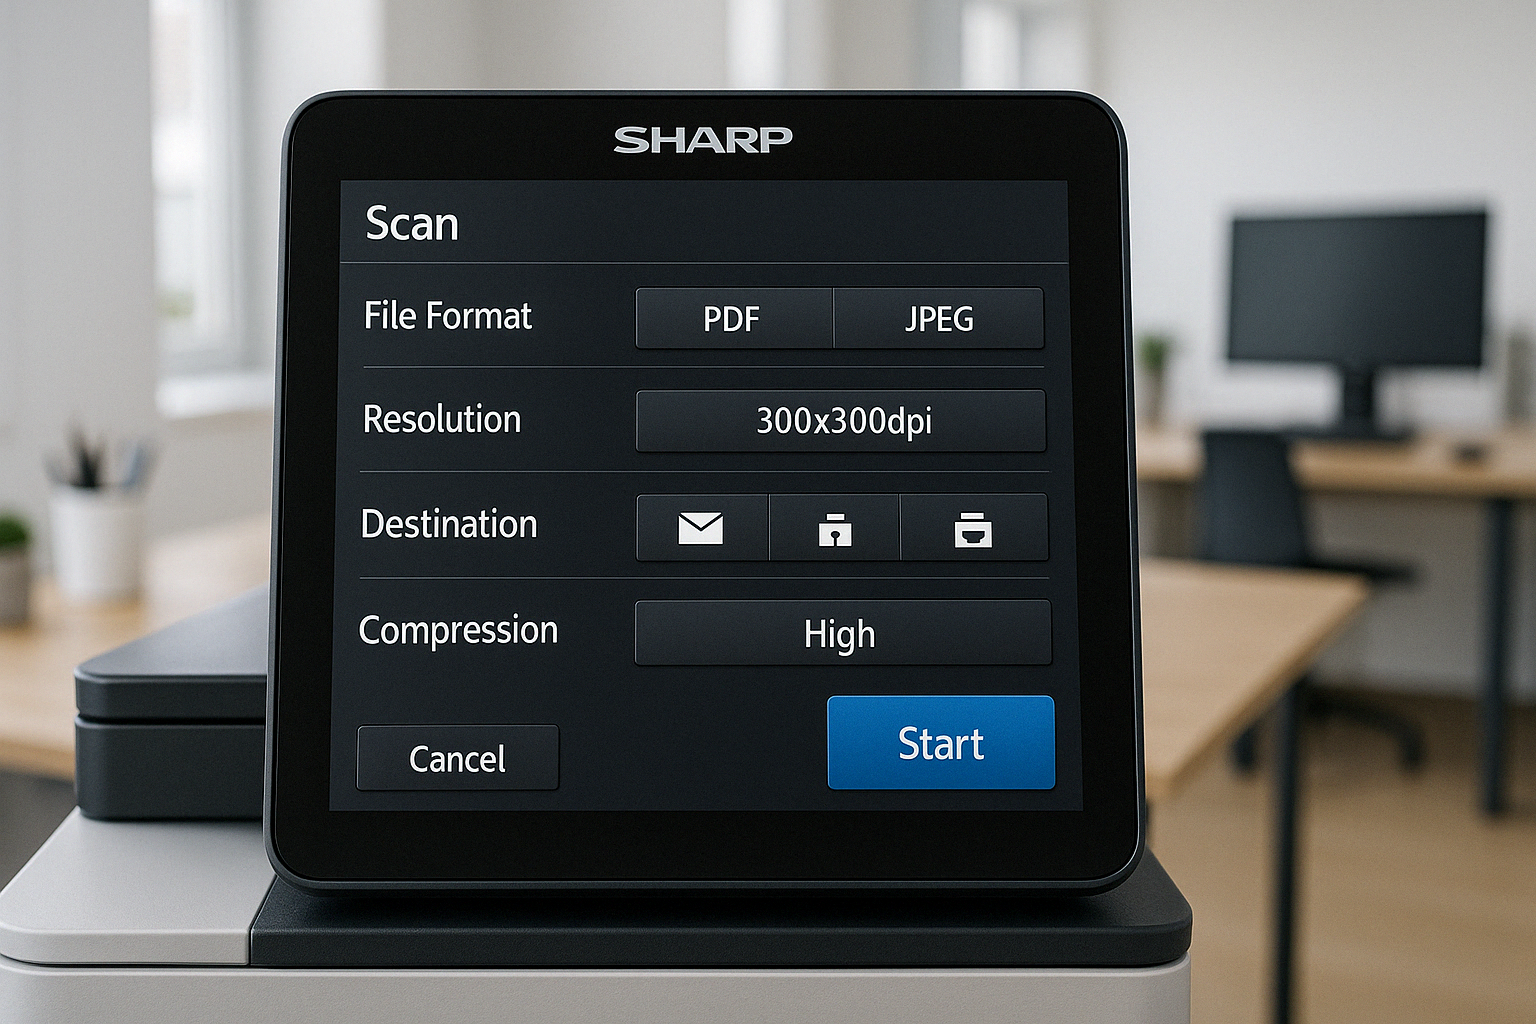
When you need to scan new documents with compression, start by pressing the “Scan” button on your printer’s control panel. From there, choose your destination—whether that’s email, a network folder, or a USB drive. Look for the “File Format” or “Send Settings” option, where you’ll find the compression settings.
The magic happens when you select “PDF” and then look for the “Compact PDF” or “Compressed PDF” option. Many Sharp models in 2025 let you adjust the compression quality to match your needs. If you’re sending text-heavy documents, you can often use higher compression without noticeable quality loss. For documents with detailed images, you might want to dial back the compression to preserve clarity.
Once you’ve set your compression preferences, configure your other scanning parameters like color mode and resolution. Place your documents in the feeder or on the scanner glass, press start, and your Sharp printer will handle the rest—creating nicely compressed files ready for storage or sharing.
For existing files already stored on your printer, the process is just as simple. Press the “Document Filing” button on the control panel, steer to where your files are stored, and select the ones you want to compress. Look for “Others” or “More” to find compression options, select your desired settings, and confirm to apply the compression.
Here’s a quick reference list for enabling Compact PDF on most Sharp printer models in 2025:
- Access Scan Mode on the control panel
- Steer to scanning settings menu
- Select “File Format” or “PDF Settings”
- Choose “Compact PDF” or “Compressed PDF”
- Adjust compression quality if available
- Configure other scan parameters
- Place your documents
- Start scanning
- Send or save your compressed file
Accessing the Document Filing Feature to Compress Files
The Document Filing feature is truly one of the hidden gems on Sharp printers. Think of it as your printer’s personal filing cabinet—it allows you to store jobs as files on the printer’s hard drive for later use, whether you need to print them again or send them somewhere else.
To access this handy feature, simply press the “Document Filing” button on your Sharp printer’s home screen. You’ll see three main folders—the Main Folder for files that everyone needs to access, Custom Folders for organizing by department or project, and the Quick File Folder for temporary storage.
When you steer to the appropriate folder, you can select “File Properties” or “Filing Settings” to choose compression options before saving. The interface feels familiar and comfortable, with clearly labeled buttons and a folder structure that reminds you of your computer’s file explorer.
We’ve set up custom folder structures for many of our Philadelphia clients that match their organizational departments, making it even easier for them to find and manage their files. It’s a small touch that makes a big difference in day-to-day operations.
Adjusting Compression Settings on Your Sharp Printer
Your Sharp printer offers various compression levels to help you find that sweet spot between smaller file sizes and maintaining quality. Think of it as similar to adjusting the quality settings when saving a photo on your phone.
The compression quality levels range from None (no compression, highest quality) through Very High Quality, High Quality, and Medium Quality, all the way to Draft (maximum compression, smallest files). For most business documents, the High Quality setting offers a good balance—you’ll get meaningful file size reduction without sacrificing readability.
When choosing your compression level, consider what’s in your document. Text documents can handle higher compression, while detailed images might need lower compression to stay crisp and clear. It’s like packing for a trip—you can compress t-shirts more than delicate items!
For bitmap images, your Sharp printer supports different compression formats depending on your printer driver. JPEG works best for photographs (available with PostScript driver), RLE is great for documents with large blocks of color, and Delta Row shines with business graphics and charts.
The beauty of Sharp printers is their flexibility—you can adjust compression settings right at the printer’s control panel when scanning, or through the printer driver when printing. This means you can tailor the compression to exactly what you need for each job.
At Associated Imaging Solutions, we’ve helped businesses across Pennsylvania optimize their document workflows by finding the perfect compression settings for their needs. The right settings can make a world of difference in storage space and network efficiency without compromising document quality.
Supported File Formats and Limitations
When it comes to compressing files on your Sharp printer, you’ll find a range of supported formats that make document management much easier. Each format has its own special qualities and limitations that are worth understanding.
Your Sharp printer can handle several file types when it comes to compression. The star of the show is definitely the Compact PDF format, which works wonders for typical business documents. This clever format uses smart algorithms to shrink your file size while keeping text perfectly readable and images looking good enough for professional use.
Let’s take a look at the most common formats you can compress on your Sharp printer:
| Format | Best For | Compression Method | Quality Impact | Size Reduction |
|---|---|---|---|---|
| Text documents | Compact PDF | Minimal for text | 50-90% | |
| JPEG | Photos | JPEG compression | Varies with level | 70-95% |
| TIFF | Multi-page docs | LZW or none | Lossless options | 30-50% |
| XPS | Microsoft docs | Built-in | Minimal | 40-60% |
| BMP | Raw images | RLE or Delta Row | Depends on method | 20-40% |
While Sharp printers are quite versatile, they do have some practical limitations you should keep in mind. Most models cap out at handling files around 100MB in size – which is plenty for everyday documents but might be a constraint for graphic-heavy materials.
Higher resolution scans naturally create larger files, which can be a bit more challenging to compress effectively. If you’re working with an older Sharp model, you might notice it struggles a bit with very large compression jobs due to memory constraints. And as you might expect, full-color documents need more data and won’t compress quite as dramatically as black and white ones.
“I always tell our clients to consider their document needs before choosing compression settings,” says one of our technicians at Associated Imaging Solutions. “A text-heavy report can handle much more compression than a document filled with detailed photos.”
For businesses throughout Pennsylvania that handle specialized document types, we can help fine-tune your Sharp printer settings for the best compression performance. Our team has helped clients from small businesses in Altoona to large corporations in York optimize their document workflows.
If you’re finding that your current printer setup isn’t quite keeping up with your document processing needs, you might want to consider whether a production-grade printer would be a better fit than a standard office model. Learn more about the differences between production printers vs. office printers to see if upgrading might solve your compression and document handling challenges.
How to compress files on a Sharp printer becomes even more valuable when you understand the format options available to you. With the right settings, you can significantly reduce storage needs while maintaining document quality that meets your specific requirements.
Security Considerations and Quality Impact
When using the file compression features on your Sharp printer, you’ll want to balance convenience with both security and quality. Let’s look at how compression affects these important aspects of your document management.
Security Considerations
Good news! Your Sharp printer keeps your information safe even when you’re compressing files. The security features don’t take a break just because you’re making files smaller.
Sharp printers come equipped with several protective measures that work seamlessly with compression:
- Data Encryption: Most modern Sharp models automatically encrypt your data during processing, including when you’re compressing files. This keeps your information secure from prying eyes.
- User Authentication: You can set up your Sharp printer to require passwords or ID cards before anyone can access document filing or compression features. This means only authorized team members can compress and manage sensitive files.
- Audit Trails: For businesses that need to track document handling, Sharp printers can keep detailed logs of who compressed what files and when. This is particularly helpful for compliance requirements.
- Data Overwrite: After your Sharp printer processes a file, it can automatically overwrite the temporary data, making it virtually impossible for anyone to recover sensitive information.
These security features are especially valuable for our clients in industries with strict privacy regulations. Whether you’re a healthcare provider in Lancaster dealing with patient records or a financial institution in Philadelphia handling confidential transactions, these protections help keep your data secure while still enjoying the benefits of compression.
Quality Impact of Compression
Let’s be honest about compression: there’s always a trade-off between file size and quality. The more you compress, the smaller your file gets—but potentially at the expense of how good it looks.
How much will compression affect your documents? It really depends on a few key factors:
Document Content Matters: Regular business documents with mostly text hold up beautifully even with higher compression levels. Your meeting minutes and reports will still be perfectly readable. However, if you’re working with detailed architectural drawings or high-resolution photos, you might notice some quality loss at higher compression settings.
Finding Your Sweet Spot: Your Sharp printer offers different compression levels for a reason. For everyday use, the “High Quality” setting typically gives you the best balance—files that are significantly smaller but still look professional. For documents you’ll be archiving long-term or that contain fine details, you might want to use lower compression settings.
Original Quality Makes a Difference: Starting with clear, high-resolution originals gives the compression algorithm more to work with. Think of it as giving your Sharp printer the best possible ingredients to work with—the end result will be better.
Color Considerations: Black and white documents generally hold up better to compression than color ones. If you’re compressing color documents with photos or graphics, you might want to use a lighter compression touch to preserve those vibrant colors and details.
In our years of working with businesses across Pennsylvania, we’ve found that most users barely notice any quality difference when using moderate compression settings on typical business documents. Your Sharp printer is pretty smart about preserving what matters most in your files.
Newer Sharp models typically do an even better job balancing compression and quality thanks to improved processing power and more sophisticated algorithms. If you’re working with an older model and find the quality trade-offs challenging, it might be worth talking to us about upgrade options that could better meet your needs.
Retrieving and Managing Compressed Files
Once you’ve successfully compressed your files on a Sharp printer, you’ll need to know how to access and use them. Whether you’re sending them via email, storing them externally, or just retrieving them for printing, the process is surprisingly simple.
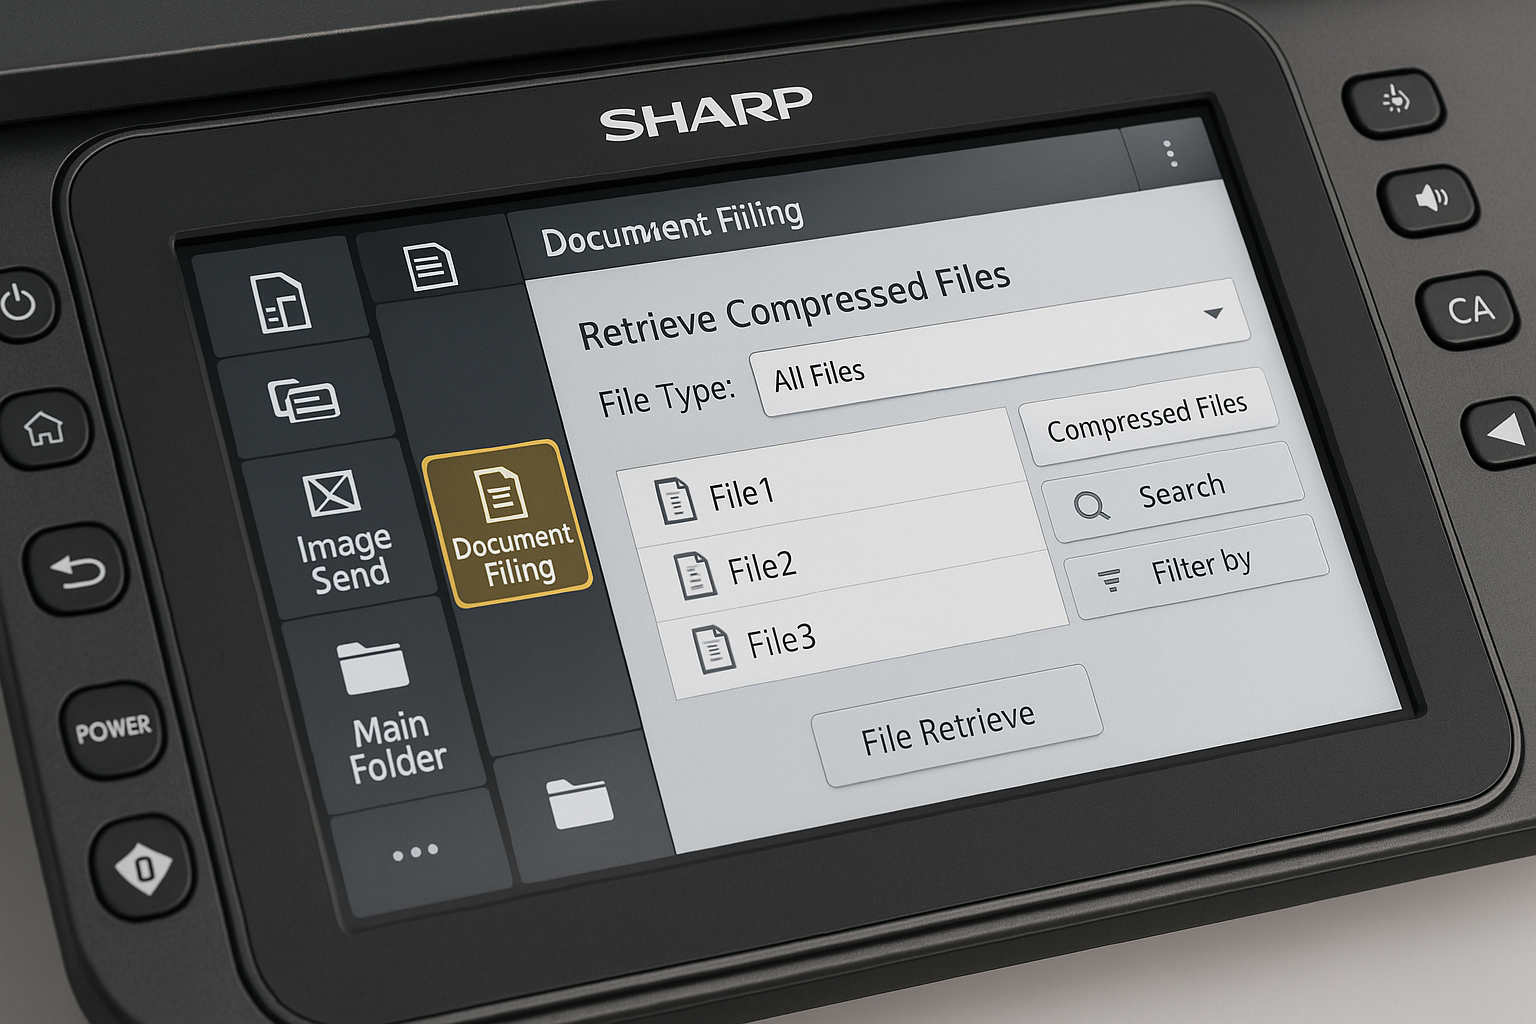
Retrieving Files from Document Filing
The Document Filing feature on your Sharp printer acts like a digital filing cabinet, keeping all your compressed documents organized and accessible. To retrieve your files, start by pressing the “Document Filing” button on the control panel – it’s usually right on the home screen. Next, steer to the folder where you stored your compressed files, whether that’s the Main Folder (for shared documents), a Custom Folder (for specific departments or projects), or the Quick File Folder (for temporary storage).
Once you’ve found your file, simply tap to select it, and you’ll see several options appear. You can view the file properties, print it directly, or send it to various destinations. The interface is clean and intuitive, making it easy even for those who aren’t particularly tech-savvy.
Sending Compressed Files via Email
One of the best things about how to compress files on a Sharp printer is how seamlessly you can share them afterward. Emailing compressed files directly from your printer eliminates the need to scan to a computer first, saving valuable time.
To email a compressed file, first locate it in Document Filing, then look for the “Send” button on your printer’s control panel. Select “E-mail” as your delivery method, and you’ll be prompted to enter recipient information. You can even customize the subject line and message body if you want to add a personal touch. When everything looks good, just hit “Send,” and your compressed file will wing its way to the recipient’s inbox.
Storing Compressed Files on External Devices
Need to take your compressed files on the go? Your Sharp printer makes that easy too. Simply plug your USB drive into the designated port on the printer (usually on the front or side panel). Then access your compressed file through Document Filing and look for the “Save to External Memory Device” option in the actions menu.
After selecting your connected storage device, confirm the transfer, and your file will copy over. This is particularly handy when you need to physically transport documents between offices or to clients who prefer receiving files this way rather than electronically.
Managing Compressed Files
Good file management practices make a world of difference when working with compressed documents. Consider organizing your files using custom folders – perhaps by client, project, or document type. This structure makes finding specific files much easier down the road.
For businesses concerned about storage space, Sharp printers allow you to set retention periods for automatic deletion after a specified time. This keeps your digital filing cabinet from becoming cluttered with outdated documents.
Security-conscious users will appreciate the ability to add password protection to sensitive compressed files. You can also mark important documents as read-only to prevent accidental modifications.
When you need to perform the same action on multiple files, Sharp printers support batch operations – select several files at once to print, send, or delete them in a single step, saving valuable time.
At Associated Imaging Solutions, we’ve helped countless Pennsylvania businesses streamline their document workflows. Recently, we worked with a Reading accounting firm to set up a system where tax documents are scanned, compressed, and automatically sorted into client folders on their Sharp printer. The smaller file sizes made it much easier for them to email returns to clients while maintaining document quality.
If you’re looking to improve your overall scanning process, our guide on how to scan a paper on a printer provides additional tips and tricks to make the most of your Sharp printer’s capabilities.
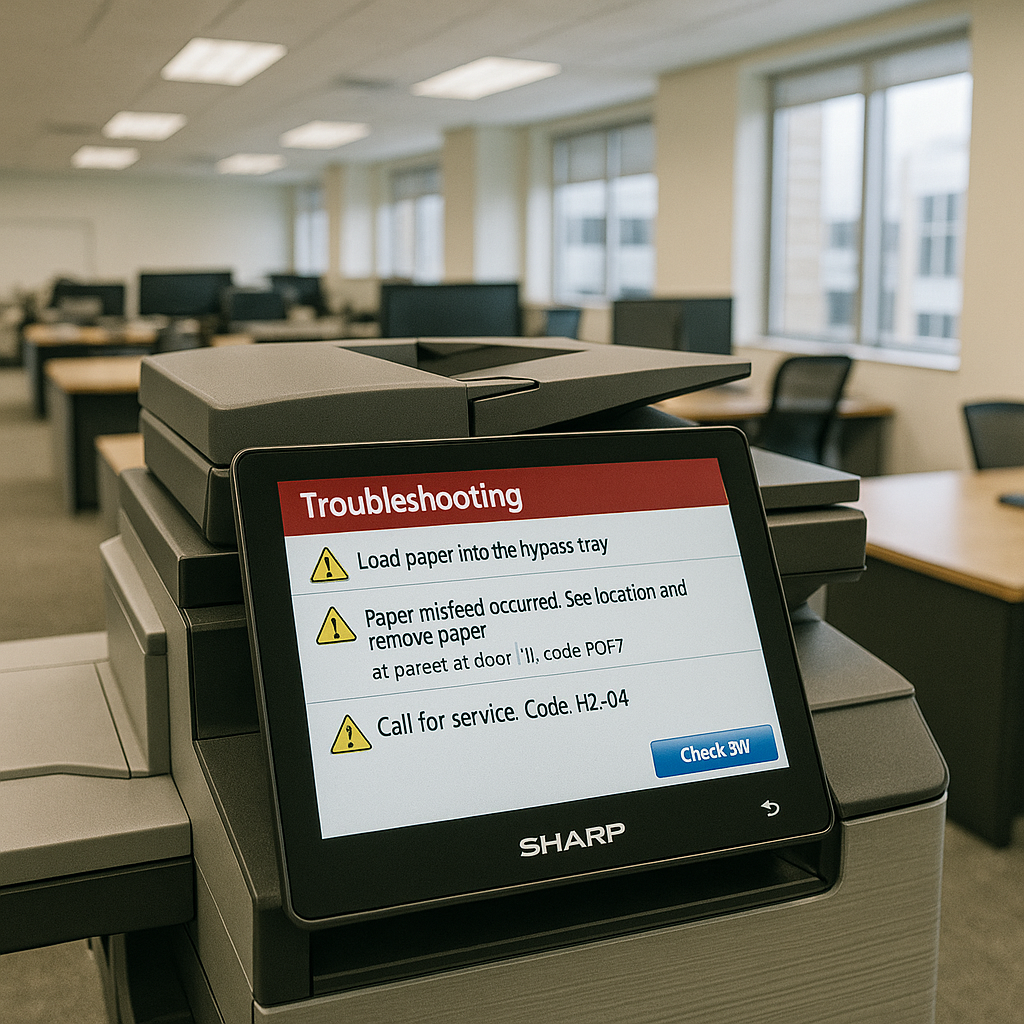
Troubleshooting File Compression Issues on Sharp Printers
Let’s face it – even the most reliable technology occasionally has hiccups, and your Sharp printer is no exception. When you’re trying to compress files on a Sharp printer, you might run into a few bumps along the way. But don’t worry! Most issues have straightforward solutions.
Compression Failure or Errors
Have you ever started a compression job only to see an error message pop up on your printer’s display? This can be frustrating, especially when you’re in a hurry.
One of our clients in Scranton recently called in April 2025 because their Sharp MX-3071 kept failing during compression. The solution was surprisingly simple – their printer’s internal storage was nearly full. After clearing some older files, everything worked smoothly again.
If you encounter compression errors, try these steps:
First, check if your original file is within the size limits. Sharp printers typically handle files up to 100MB, but extremely large files might cause processing issues. Next, verify there’s enough free space in your printer’s storage – just like your computer, your printer needs room to work.
Sometimes, the good old “turn it off and on again” approach works wonders. Power cycling your Sharp printer clears temporary system issues that might be interfering with compression. If problems persist, your printer might need a firmware update – these updates often include fixes for known issues with file handling.
Poor Quality After Compression
“My compressed files look terrible!” This is a common complaint, especially when compressing documents with images or fine details.
The most direct solution is adjusting your compression level. Higher compression means smaller files but lower quality. For important documents, try using a lower compression setting – your files will be slightly larger but will maintain more of their original quality.
The quality of your original documents matters too. Make sure your originals are clean and clear before scanning. Coffee stains, wrinkles, or faded text will only look worse after compression.
For documents where quality is crucial, try increasing the scan resolution before compression. A higher-resolution original gives the compression algorithm more data to work with, often resulting in better final quality.
Also consider the format you’re using – PDF is generally best for text documents, while JPEG might be better for photos or image-heavy content.
Slow Compression Processing
Does your Sharp printer seem to take forever to compress files? This is typically related to file complexity or system resources.
Documents with numerous images, complex formatting, or very high resolution will naturally take longer to process. If speed is important, consider simplifying your documents when possible.
For networked operations, your connection can be a bottleneck. We once helped a marketing firm in Allentown troubleshoot slow compression times in early 2025 only to find their printer was connected via an outdated network switch. After upgrading their network infrastructure, compression speeds improved dramatically.
When dealing with large batches of documents, try breaking them into smaller sets. Not only does this make each job more manageable, but it also allows you to continue working with some files while others are still processing.
If you regularly need to compress large volumes of documents, consider scheduling these jobs during off-hours when the printer isn’t needed for other tasks.
Compressed Files Not Appearing in Storage
It’s puzzling when your files seem to compress successfully but then vanish into thin air. Before calling for help, try these simple checks:
Verify you’re looking in the correct storage location. Sharp printers have multiple folders (Main, Custom, Quick File), and it’s easy to forget which one you selected. If you’re having trouble locating files, try sorting by date to find your recently created compressed files.
Check your user permissions – especially in office environments where printers are configured with access restrictions. You might not have rights to view files in certain folders.
Some Sharp printer folders have automatic deletion enabled to manage storage space. Your IT department or we at Associated Imaging Solutions can help adjust these settings if needed.
Best Practices to Prevent Issues
An ounce of prevention is worth a pound of cure, especially when it comes to compressing files on your Sharp printer.
Keep your printer in top condition with regular maintenance. Just like your car needs oil changes, your printer performs better with routine care. Our service technicians can set up a maintenance schedule that minimizes disruptions to your workflow.
Be proactive about managing storage space on your printer. Periodically clean up unnecessary files, especially from the Quick File folder which is often overlooked.
For teams that regularly use compression features, we recommend creating a simple reference guide with optimal settings for different document types. This prevents quality issues and saves time spent adjusting settings.
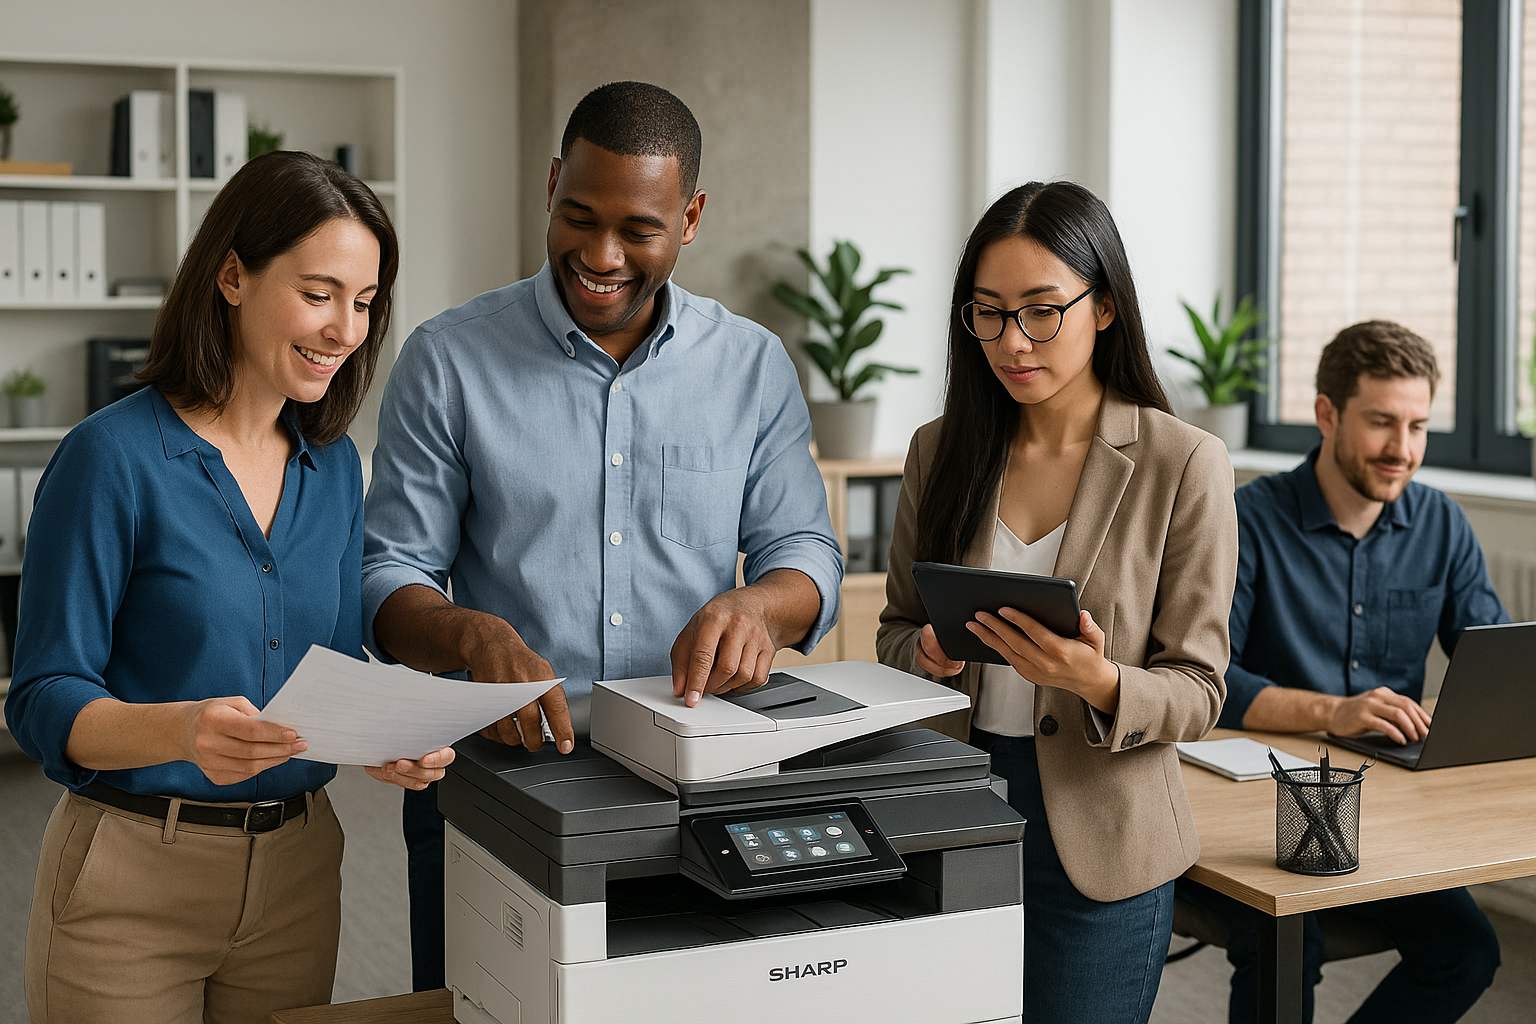
Finally, proper training makes a huge difference. When we install new Sharp printers for clients across Pennsylvania, we always include hands-on training sessions for staff. Understanding the basics of troubleshooting saves valuable time when minor issues arise.
If you’re experiencing persistent problems with file compression on your Sharp printer, don’t struggle alone. Our technicians at Associated Imaging Solutions are just a phone call away, ready to help businesses from Philadelphia to Pittsburgh get the most from their document management systems.
Frequently Asked Questions about Compressing Files on Sharp Printers
How does file compression affect file quality?
When you compress files on your Sharp printer, you’re essentially asking the machine to make a judgment call between file size and visual quality. Think of it like packing for vacation – the more you compress your clothing, the more you can fit, but your shirts might come out a bit wrinkled!
The quality impact varies based on what you’re compressing. Text-heavy documents typically hold up remarkably well, even with significant compression. You’ll barely notice any difference in readability. However, documents containing photos or detailed graphics might show some noticeable changes at higher compression levels.
Many of our clients in Harrisburg and Philadelphia find that the “High Quality” compression setting hits the sweet spot – reducing file sizes by 60-70% while keeping documents looking crisp and professional. For everyday business documents, this setting works beautifully.
The original quality matters too. If you’re starting with clear, high-resolution materials, you’ll get better results after compression. It’s like making a copy of a copy – each generation loses a bit of clarity. Starting with the best possible original helps maintain quality through the compression process.
Can compressed files be sent directly via email or stored externally?
Absolutely! One of the best things about Sharp printers is their flexibility in handling your compressed files. You’re never locked into just one option.
For email distribution, you can send compressed files directly from your Sharp printer without ever touching a computer. The interface walks you through selecting recipients (either manually entering email addresses or choosing from your address book), customizing the subject line, and even adding a brief message. Many of our clients in Pittsburgh use this feature daily to distribute meeting minutes and reports.
Sharp printers are equally accommodating when it comes to external storage options. You can save your compressed files to a USB drive plugged directly into the printer, send them to a network folder, or even connect to cloud services like Google Drive or OneDrive on newer models.
We recently helped a law firm in Allentown set up a workflow where case documents are scanned, automatically compressed, and stored in matter-specific folders on their secure network. The time savings have been substantial, and their digital storage needs dropped by nearly 40%.
What steps should I take if file compression fails?
Even the best technology occasionally hits a snag. If you run into trouble compressing files on your Sharp printer, don’t worry – most issues have simple solutions.
First, check if the printer is displaying any specific error messages. These often provide clues about what’s going wrong. Is it complaining about memory, file size, or connection issues?
Take a look at your original documents. Are they wrinkled, torn, or stained? Physical document quality can impact the scanning and compression process. Smoothing out pages before scanning can make a big difference.
Sometimes the simplest fix works best – try canceling the current job and starting fresh. If that doesn’t help, adjusting your compression settings might do the trick. Try a different compression level or file format.
Storage space is another common culprit. Check whether your destination (whether it’s the printer’s internal storage, a network folder, or a USB drive) has enough free space for your compressed files.
If you’re still having trouble, our technicians at Associated Imaging Solutions can help. We support businesses throughout Pennsylvania, from Erie to Philadelphia, and can quickly diagnose compression issues either remotely or on-site.
How secure are compressed files stored on Sharp printers?
Security is a major concern for many of our clients, especially those in healthcare and financial services. The good news is that Sharp printers offer robust security features for your compressed files.
User authentication is your first line of defense. You can configure your Sharp printer to require login credentials before anyone can access stored files. This prevents unauthorized personnel from browsing through sensitive documents.
For particularly sensitive information, you can apply password protection to individual files during the compression process. This adds an extra layer of security, especially for documents that might need to be shared with specific individuals.
Many Sharp models also include data encryption for files stored on their internal hard drives. This means that even if someone were to physically remove the drive, they couldn’t access your data without the proper credentials.
For businesses with document retention policies, Sharp printers support automatic deletion of files after a specified period. This helps ensure that sensitive information doesn’t linger longer than necessary.
One of our banking clients in Philadelphia particularly appreciates the audit logging capabilities, which track who accessed which files and when – a helpful feature for compliance and security monitoring.
At Associated Imaging Solutions, we take security seriously and can help configure these features to match your specific business requirements and compliance needs.
Conclusion
Mastering how to compress files on a Sharp printer is a valuable skill that can significantly improve your document management efficiency. By following the steps outlined in this guide, you can reduce file sizes without sacrificing document quality, making storage, sharing, and archiving much more manageable.
The compression features built into Sharp printers represent just one aspect of these versatile machines’ capabilities. From security features that protect sensitive information to connectivity options that streamline workflows, modern Sharp printers are designed to improve productivity in busy offices where document handling is a daily challenge.
At Associated Imaging Solutions, we’ve seen how proper file compression can transform document management for our clients. A law firm in Harrisburg recently reduced their digital storage costs by nearly 30% in 2025 after our team configured their Sharp MX-6071 with optimized compression settings. Their paralegals now spend less time waiting for files to transfer and more time on their actual work.
We’re proud to serve businesses throughout Pennsylvania, from small offices in Allentown to corporate headquarters in Philadelphia. Our friendly technicians become familiar faces at many of our client locations, providing personalized support that goes beyond the typical service call. We believe in building relationships, not just fixing machines.
Whether you’re struggling with email attachment size limits or running out of network storage space, mastering your Sharp printer’s compression features can make a real difference in your daily operations. The time you save not waiting for large files to process or transfer can add up to significant productivity gains over time.
Compressing files with your Sharp printer streamlines your document workflow and represents a small but significant step toward more efficient business operations. By reducing file sizes, you not only save storage space but also improve transmission speeds for emailed documents and reduce network bandwidth consumption for shared files.
For more information about our comprehensive range of printer and copier solutions, visit our page on copiers and printers. If you have questions about optimizing your Sharp printer’s compression settings or any other aspect of document management, give us a call. We’re real people who love helping our Pennsylvania neighbors get the most from their office technology.
Related Posts

— Decode and Clear: Handling Sharp Photocopier Error Codes
— How to Download Sharp Drivers: 3 Methods That Guarantee Results