Sharp Connections: A Guide to Linking Your Printer to Your Computer

April 14, 2025
 0 views
 0 comments
To help you efficiently tackle the task of connecting your Sharp printer to your computer, here’s a straightforward breakdown of how to connect sharp printer to computer:
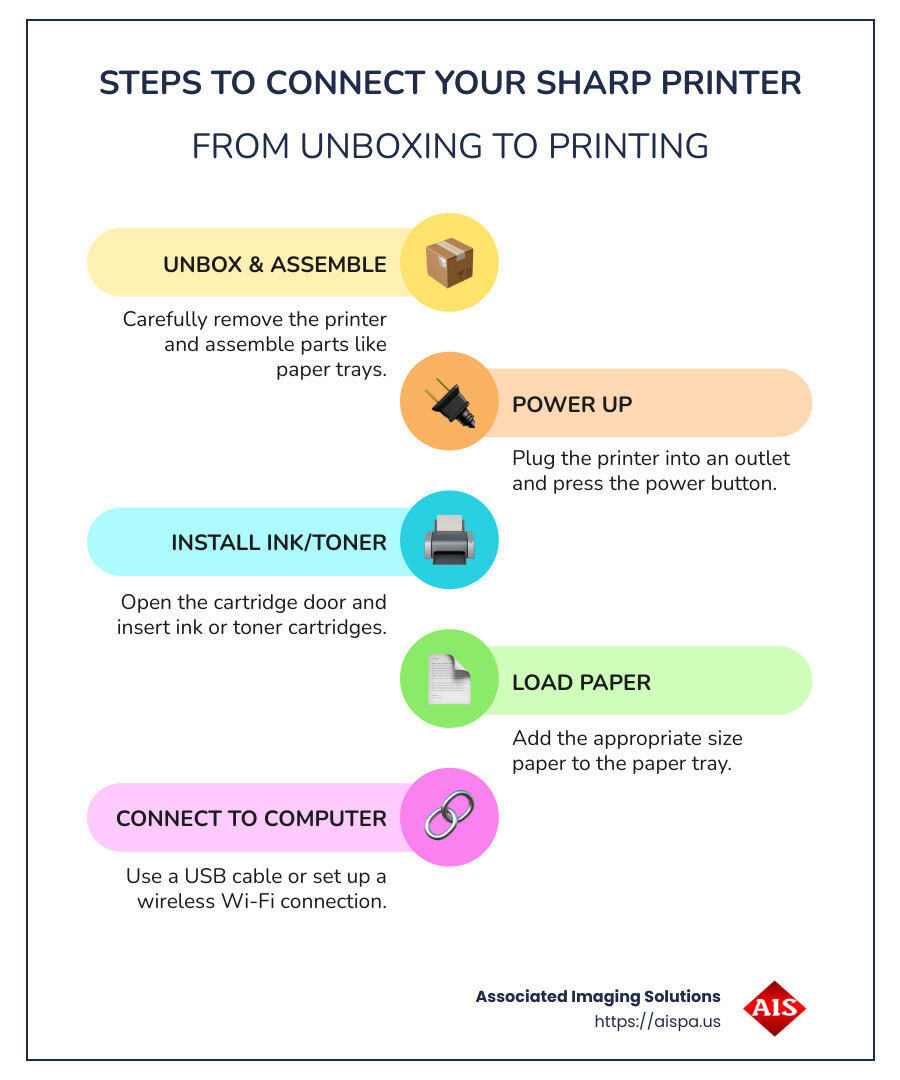
- Unbox and Assemble: Carefully remove the printer from its box. Assemble parts like paper trays following the manual.
- Power Up: Plug the printer into an outlet and press the power button.
- Install Ink/Toner: Open the printer’s cartridge door and insert the ink or toner cartridges.
- Load Paper: Add the right size paper to the paper tray.
- Connect: Use a USB cable or set up a wireless connection via your Wi-Fi network.
Imagine trying to piece together a jigsaw without a reference image—setting up a new printer can feel very similar. At first glance, the array of cables, trays, and instructions might seem overwhelming. However, once broken down into clear steps, the process becomes much easier.
Unboxing Your Sharp Printer is your first task. Ensure that you have all necessary components such as ink cartridges, power cords, and manuals. Missing items can lead to setup delays.
Next, focus on the Initial Setup. Assemble all detachable parts like document feeders and paper trays according to the manual. Plug the printer into a suitable power source and prepare the ink or toner cartridges for installation.
After powering up, move on to connecting the printer with your computer, either through a USB cable or a wireless Wi-Fi connection. This step transforms your printer from a mere device into an indispensable office asset.
Get your workspace streamlined and efficient with these tips—perfect for busy office managers in need of seamless, eco-friendly printer solutions. The goal is to make sure every printer in Philadelphia runs smoothly with local support and minimal downtime.
Explore more about how to connect sharp printer to computer:
How to Connect Sharp Printer to Computer
USB Connection
Connecting your Sharp printer to a computer via USB is a straightforward process. This method is ideal if you prefer a direct and stable connection without relying on network settings or Wi-Fi.
1. Gather Your Materials
Before starting, make sure you have the following:
- A USB A to USB B cable (the USB A end connects to your computer, and the USB B end connects to your printer).
- Your Sharp printer.
- A computer with the appropriate operating system.
2. Physical Connection
- Plug the USB Cable: Insert one end of the USB cable into the USB B port on your Sharp printer. The other end goes into the USB A port on your computer.
3. Install Printer Drivers
- Windows Users: Go to Settings > Devices > Printers & Scanners. Click on Add a printer or scanner. If the printer isn’t detected, download the latest drivers from the Sharp website.
- Mac Users: Steer to System Preferences > Printers & Scanners. Click the + button to add a new printer. Select your Sharp printer from the list and install any necessary drivers.
4. Configure Printer Settings
Once your printer is added, adjust settings such as default paper size and print quality. Print a test page to ensure everything is working correctly.

Wireless Setup
If you prefer a cable-free setup, connecting your Sharp printer wirelessly is an excellent option. This allows you to place your printer anywhere within your Wi-Fi network’s range.
1. Prepare Your Printer
- Ensure your printer is powered on and ready for wireless setup.
- Access the printer’s control panel to steer to the wireless settings menu.
2. Connect to Wi-Fi
- Network Settings: Use the printer’s menu to search for available Wi-Fi networks. Select your network and enter the Wi-Fi password when prompted.
- Make sure your computer is connected to the same Wi-Fi network as the printer.
3. Install Printer Drivers
- Windows Users: In Settings > Devices > Printers & Scanners, click Add a printer or scanner. Windows will search for available printers. If your Sharp printer appears, select it and follow the on-screen instructions.
- Mac Users: Go to System Preferences > Printers & Scanners. Click the + button and choose your Sharp printer from the list.
4. Verify Connection
Print a test page to confirm the wireless setup is successful. If the printer is not detected, double-check the Wi-Fi password and network settings.

By following these steps, you can seamlessly connect your Sharp printer to your computer, whether you opt for a USB or wireless connection. This ensures that your office or home setup is efficient and ready for any printing tasks.
Installing Sharp Printer Drivers
Once your Sharp printer is physically connected or set up wirelessly, the next step is to install the necessary drivers. This ensures your printer communicates effectively with your computer, whether you’re using Windows 10 or Windows 11.
Windows 10
1. Download the Drivers
- Visit the Sharp support page and locate the drivers for your specific printer model.
- Ensure you select the correct drivers for Windows 10 to avoid compatibility issues.
2. Install the Drivers
- Open Settings by clicking the Start menu and selecting the gear icon.
- Steer to Devices > Printers & Scanners.
- Click Add a printer or scanner. Windows will automatically search for available devices.
- If your printer is detected, select it and click Add device. If not, manually install the downloaded drivers by opening the file and following the on-screen instructions.
3. Device Detection
- Once installed, your printer should appear in the list of available devices.
- Print a test page to confirm the installation was successful.
Windows 11
1. Download the Drivers
- As with Windows 10, go to the Sharp support page and download the drivers appropriate for Windows 11.
2. Install the Drivers
- Open Settings from the Start menu.
- Go to Bluetooth & devices > Printers & scanners.
- Click Add device and choose Add a printer or scanner.
- Wait for Windows to detect your printer. If it appears, select it and follow any additional prompts to complete the setup.
3. Device Detection
- Your printer should now be listed among the connected devices.
- Always print a test page to verify that the printer works correctly.
By following these steps, you’ll ensure your Sharp printer is ready for any printing tasks on both Windows 10 and Windows 11. This process helps maintain a smooth operation and minimizes potential connectivity issues.
Troubleshooting Common Connectivity Issues
Connecting your Sharp printer to your computer can sometimes come with challenges. Here’s how to tackle common connectivity issues to get your printer running smoothly.
Verify Connections
Check Your Connections:
- Wi-Fi: Ensure your Sharp printer and computer are on the same Wi-Fi network. If your printer has trouble connecting, restart your router and try reconnecting.
- Ethernet: If using an Ethernet cable, make sure it’s securely connected to both the printer and the router. A loose cable can cause connectivity issues.
- Power: Double-check that your printer is turned on and properly plugged into a power source. Sometimes, a simple power cycle can resolve many issues. Turn the printer off, wait a few seconds, and then turn it back on.
Update Drivers
Keep Drivers Up to Date:
- Download the Latest Drivers: Visit the Sharp support page to find and download the latest drivers for your printer model. Outdated drivers can lead to compatibility issues.
- Install the Drivers: After downloading, run the installation file and follow the on-screen instructions. This ensures your printer communicates properly with your computer.
- Check for Automatic Updates: Some systems allow you to enable automatic updates for drivers, which can be a helpful way to keep everything current without manual intervention.
Reset Network Settings
Reconfigure Network Settings:
- Manual Reset: Consult your printer’s manual to learn how to reset its network settings. This often involves pressing a series of buttons on the printer itself.
- Reconnection: After resetting, reconnect your printer to the Wi-Fi network. Enter the correct Wi-Fi password and ensure the network is stable.
- IP Configuration: Verify that the printer’s IP address is on the same subnet as your computer. If needed, you can manually set a static IP to avoid future conflicts.
By systematically addressing these areas, you can resolve most issues related to connecting your Sharp printer to your computer. If problems persist, consulting the user manual or reaching out to Sharp support can provide additional guidance.
Frequently Asked Questions about Connecting Sharp Printers
How to Find the IP Address of My Sharp Printer?
Finding the IP address of your Sharp printer is a simple task that can be done directly from the printer’s settings menu. Here’s how:
- Access the Settings Menu: On your printer’s control panel, steer to the settings or network settings menu. This is often represented by a gear or wrench icon.
- Print a Network Configuration Page: Look for an option to print a network configuration page. This page will display the IP address, along with other network details.
- Check the Display Screen: If your printer has a display screen, the IP address might be visible under network settings.
Knowing your printer’s IP address is crucial for network troubleshooting and ensuring your printer is correctly configured.
Can I Connect My Sharp Printer Wirelessly?
Yes, most modern Sharp printers support wireless connections, allowing you to print without the hassle of cables. Here’s a quick guide to setting up your printer wirelessly:
- Wi-Fi Setup: Ensure your printer is within range of your Wi-Fi network. Access the Wi-Fi setup option from the printer’s menu and select your network from the list of available networks.
- Enter the Wi-Fi Password: Use the printer’s keypad or touchscreen to enter your Wi-Fi password. Make sure you enter it correctly to avoid connection issues.
- Network Compatibility: Ensure your printer and computer are connected to the same Wi-Fi network. This is necessary for them to communicate effectively.
- Test the Connection: Once connected, print a test page to confirm that the wireless setup is successful.
What Should I Do If My Printer Is Not Detected?
If your Sharp printer is not detected by your computer, don’t worry. Here are some steps to troubleshoot the issue:
- Check Network Settings: Ensure your printer is connected to the correct network. If using Wi-Fi, both devices must be on the same network.
- Restart Devices: Turn off your printer and computer, wait a few seconds, then turn them back on. This can often resolve detection issues.
- Update Drivers: Make sure you have the latest drivers installed. Visit the Sharp support page to download and install the appropriate drivers for your printer model.
- Run Troubleshooter: Use the built-in printer troubleshooter on your computer. This can automatically detect and fix common problems.
- Check Firewall Settings: Sometimes, firewall or antivirus software can block printer connections. Temporarily disable them to see if this resolves the issue.
By following these steps, you can address most common connectivity issues and get your Sharp printer working seamlessly with your computer. If you continue to experience problems, refer to your printer’s manual or contact Sharp support for further assistance.
Conclusion
At Associated Imaging Solutions, we pride ourselves on providing personalized service and advanced technology to meet your business needs. Our commitment to quality and customer satisfaction sets us apart in the printer leasing industry. Whether you’re setting up your Sharp printer for the first time or troubleshooting connectivity issues, we’re here to help every step of the way.
Our team understands that each business has unique requirements. That’s why we offer custom solutions that not only improve your document management but also ensure your office equipment operates seamlessly. With our expertise, you can maximize the efficiency of your Sharp printers and copiers, allowing you to focus on what truly matters—growing your business.
Choosing us means choosing a partner who values your success as much as you do. Our local presence in Pennsylvania, combined with global standards, ensures that you receive the best of both worlds. From installation to ongoing support, our goal is to make your experience as smooth and productive as possible.
Explore more about our services and see how we can assist you in optimizing your office technology by visiting our copiers and printers service page. Let’s work together to lift your business operations with the power of Sharp technology.
Related Posts

— Decode and Clear: Handling Sharp Photocopier Error Codes
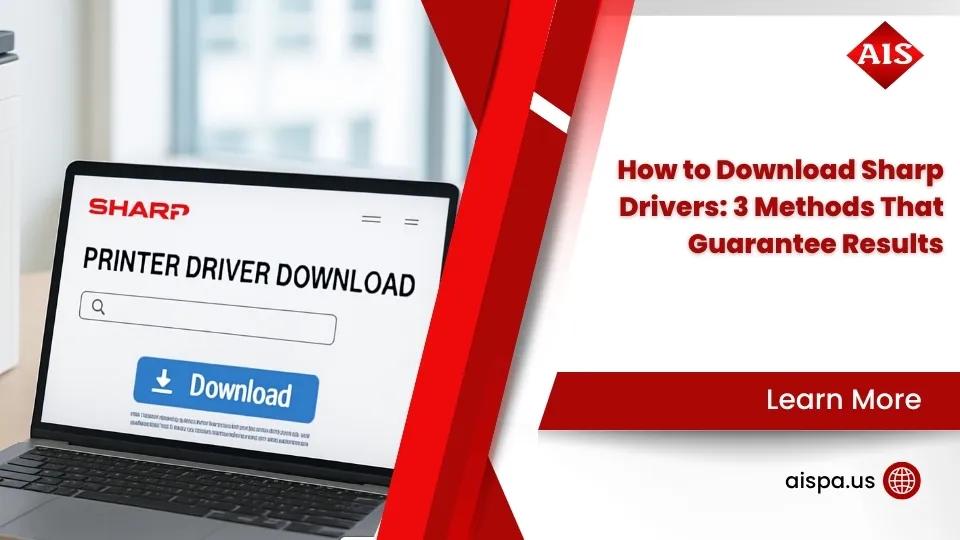
— How to Download Sharp Drivers: 3 Methods That Guarantee Results