From Zero to Print: Installing a Sharp Printer on Your PC
Getting your Sharp printer up and running on your PC doesn’t have to be a daunting task. If you’re wondering how to add sharp printer to pc, here’s a quick guide to get you started:
- Download the Driver: Visit Sharp’s official website to find and download the correct driver for your printer model.
- Connect the Printer: Use a USB cable for a direct connection or set up a network connection via WiFi or Ethernet.
- Install the Driver: Run the downloaded file, follow the installation prompts, and configure settings.
- Set It Up: Ensure the printer is set as the default and tries printing a test page to confirm successful installation.
Installing a Sharp printer involves a few straightforward steps, whether you’re connecting through a USB or over a network. With many modern Sharp printers being multifunctional devices, they offer a seamless blend of features that suit both small offices and larger corporate environments.
Whether you’re managing a small team or outfitting a busy office, setting up a Sharp printer can significantly streamline your operations. From scanning to printing and even faxing, these devices are engineered to optimize your workflow while ensuring that your sensitive documents remain secure through robust data encryption features.

How to Add Sharp Printer to PC
Adding a Sharp printer to your PC can be a smooth process. Let’s break it down into two main connection types: USB and Network.
Connecting via USB
For a direct connection, USB is the simplest method. Here’s a step-by-step guide:
- Gather Your Materials: You’ll need a USB A to USB B cable, your Sharp printer, and a computer.
- Physical Connection: Connect one end of the USB cable to your printer and the other to your PC. Make sure both devices are powered on.
- Windows Settings: On your PC, go to Settings > Devices > Printers & Scanners. Click on “Add a printer or scanner.”
- Printer Detection: Your PC should automatically detect the connected Sharp printer. If not, click on “The printer that I want isn’t listed” and follow the prompts.
- Driver Installation: If prompted, download and install the necessary drivers from the Sharp website.
- Add Device: Once detected, select your printer from the list and click “Add device.”
That’s it! Your printer should now be ready to use.
Connecting via Network
For a wireless setup, connecting via WiFi or Ethernet is ideal, especially in office environments:
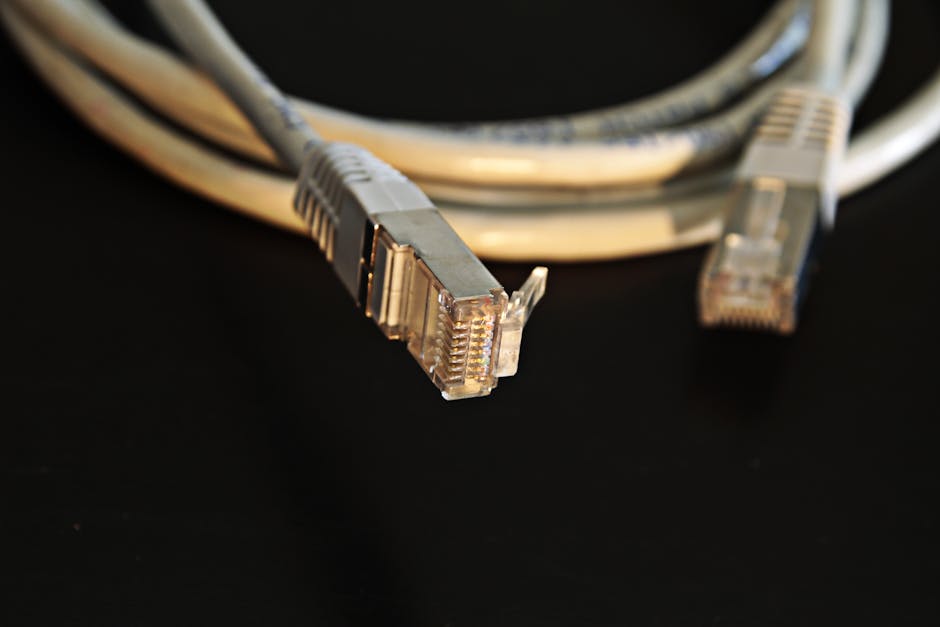
- Network Setup: Ensure your printer is connected to the same network as your PC. Use either a WiFi connection or an Ethernet cable to connect the printer to your router.
- Windows Settings: On your PC, steer to Settings > Devices > Printers & Scanners. Click on “Add a printer or scanner.”
- Printer Detection: If your printer is connected to the network, it should appear in the list of available devices. Select your printer and click “Add device.”
- Driver Installation: If necessary, download the appropriate drivers from the Sharp website.
- Configuration: Once added, you can configure additional settings like paper size and print quality from the printer properties menu.
Connecting your Sharp printer to your PC via a network allows for greater flexibility and is perfect for environments where multiple users need access to the same printer.

In both connection methods, ensure that your printer is set as the default printer to avoid any printing issues. If you encounter any problems, refer to the user manual or the Sharp support website for troubleshooting tips.
Next, we’ll dig into downloading and installing Sharp printer drivers to ensure smooth operation.
Downloading and Installing Sharp Printer Drivers
To get your Sharp printer up and running smoothly, you’ll need to download and install the correct printer drivers. This process involves a few key steps, ensuring compatibility with your operating system and selecting the right installation method for your needs.
Standard Installation Process
- Visit the Sharp Website: Head over to the Sharp Product Downloads page. This is the best place to find the latest drivers for your printer model.
- Locate Your Printer Model: Use the search function to find your specific printer model. Make sure you select the correct model to avoid compatibility issues.
- Select Your Operating System: Choose the driver that matches your operating system, whether it’s Windows or macOS. It’s crucial to select the right OS version to ensure smooth operation.
- Download the Driver: Click on the download link and save the file to a convenient location on your computer. You might need administrator privileges to proceed with the installation.
- Run the Installer: Locate the downloaded file and double-click to run the installer. Follow the on-screen prompts, accepting the terms and conditions when prompted.
- Complete the Installation: The installer will guide you through the setup. Once finished, it’s a good idea to restart your computer to finalize the installation.
Advanced Installation Options
For those who require more control over the installation process, Sharp offers advanced driver options like PS (PostScript) drivers and PPD (PostScript Printer Description) drivers. These are particularly useful for environments that need precise print quality and compatibility with specific applications.
- PS Drivers: Ideal for users who need high-quality print output, especially when using PostScript fonts. Some printer models may require an optional PS expansion kit.
- PPD Drivers: These drivers provide a detailed description of the printer’s capabilities, allowing for more customized print settings. They are often used in professional printing environments.
To access these advanced options:
- Select Advanced Settings: During the installation process, choose the Advanced installation method. This option allows you to specify the type of driver you want to install.
- Configure Driver Settings: You can adjust settings such as resolution, color management, and paper handling to suit your specific needs. Be sure to check the “Run the Autoconfiguration” option to automatically detect the printer’s features.
- Finalize Installation: Once you’ve configured the settings, complete the installation by following the remaining prompts. A test page will usually print to confirm successful setup.
By carefully selecting and installing the appropriate drivers, you ensure that your Sharp printer performs optimally and meets your specific printing needs. Whether you choose a standard or advanced installation, having the right drivers is key to a seamless printing experience.
Next, we’ll explore how to configure printer settings for optimal performance.
Configuring Printer Settings
Once your Sharp printer drivers are installed, it’s time to fine-tune the printer settings for the best performance. This involves configuring options like setting a default printer, adjusting paper size and print quality, and utilizing auto configuration features. These steps ensure that your printer is ready to deliver high-quality prints custom to your needs.
Setting Up Printer Options
Default Printer: Setting your Sharp printer as the default ensures that all print jobs are sent to it by default. This is especially useful in environments with multiple printers. To set your Sharp printer as the default, steer to your computer’s printer settings, right-click on your Sharp printer, and select “Set as default printer.”
Paper Size and Print Quality: Adjusting the paper size and print quality settings can significantly impact the final output. Whether you’re printing documents or high-resolution images, these settings can be customized in the printer properties menu. Access this menu by right-clicking on your Sharp printer in the devices list and selecting “Printer properties.” Here, you can choose the default paper size, such as A4 or Letter, and set the print quality to draft, standard, or high quality, depending on your needs.
Auto Configuration: The auto configuration feature simplifies the setup by automatically detecting and setting up the printer’s features. This includes recognizing installed trays, finishers, and other accessories. In the printer properties, look for an option labeled “Auto configuration” and enable it to let the printer automatically adjust its settings.
Printing a Test Page
After configuring the printer settings, it’s crucial to print a test page to verify that everything is working correctly. A successful test page indicates that the printer is properly installed and configured.
How to Print a Test Page:
- Access Printer Properties: Go to “Devices and Printers” on your computer, right-click on your Sharp printer, and select “Printer properties.”
- Print Test Page: In the properties window, click on the “Print Test Page” button. This will send a test print job to the printer.
- Verify Output: Check the printed test page for clarity and alignment. If the page prints without issues, your setup is complete. If there are problems, such as missing text or misaligned prints, revisit the settings to make necessary adjustments.

By following these steps to configure your Sharp printer settings, you ensure that your device is ready for efficient and high-quality printing. Next, we’ll address some common questions about adding Sharp printers to your PC.
Frequently Asked Questions about Adding Sharp Printers
How to Connect Sharp Printer to Computer Wireless
Connecting your Sharp printer wirelessly is convenient and eliminates the need for extra cables. Here’s how to set it up:
- Enable Wireless Mode: First, ensure your Sharp printer is in wireless mode. Check the printer’s manual for specific instructions on activating this mode.
- Connect to Network: Use the printer’s control panel to connect to your WiFi network. You’ll need to enter your network’s name (SSID) and password. If the printer has a touchscreen, follow the on-screen prompts to connect.
- Install Drivers on PC: Download the appropriate drivers from the Sharp website. Install them on your computer to ensure compatibility and functionality.
- Add Printer in Windows: Go to “Settings” > “Devices” > “Printers & Scanners” on your Windows PC. Click “Add a printer or scanner,” and your Sharp printer should appear in the list. Select it to complete the setup.
- Test the Connection: Print a test page to confirm the wireless setup is successful.
How to Install Sharp Printer Driver on Windows 10
Installing the correct driver is crucial for your printer to function properly on Windows 10:
- Download the Driver: Visit the Sharp website to download the driver for your specific printer model. Ensure you select the driver compatible with Windows 10.
- Run the Installer: Locate the downloaded driver file, double-click it, and follow the installation wizard. You may need to agree to terms and select installation preferences.
- Connect Printer: If your printer is not already connected, do so via USB or network during the installation process when prompted.
- Complete Installation: Once the installation is complete, restart your computer if prompted. This ensures all settings are applied correctly.
- Verify Installation: Go to “Devices and Printers” in the Control Panel to check if your Sharp printer is listed. Print a test page to confirm everything is working.
How to Add Sharp Printer to PC via USB
Adding a Sharp printer to your PC via USB is straightforward and typically faster than wireless setup:
- Gather Materials: Ensure you have a USB A to USB B cable. Connect the USB A end to your PC and the USB B end to your printer.
- Turn On Printer: Power on your Sharp printer and wait for it to initialize.
- Install Drivers: If not already installed, download the necessary drivers from the Sharp website and install them on your PC.
- Add Printer in Windows: Steer to “Settings” > “Devices” > “Printers & Scanners” on your Windows PC. Click “Add a printer or scanner,” and your Sharp printer should appear. Select it to finalize the setup.
- Print a Test Page: To ensure the connection is successful, print a test page from the printer properties menu.
By following these steps, you’ll have your Sharp printer set up and ready to go, whether connected wirelessly or via USB. Next, we’ll explore some common troubleshooting tips for those occasional hiccups during the installation process.
Conclusion
At Associated Imaging Solutions, we pride ourselves on combining personalized service with cutting-edge technology to make your printing experience seamless. Adding a Sharp printer to your PC might seem daunting, but with our guidance, it’s a breeze. Whether you’re connecting via USB or setting up a wireless network, we ensure you have the right tools and support every step of the way.
Our expertise in the printer leasing industry allows us to offer advanced technology that improves your business’s document management. With high-quality copier rentals, repairs, and managed print services, we tailor solutions that align with your unique needs. Our local presence in Philadelphia means we’re always ready to provide prompt and reliable service, ensuring your office runs smoothly.
By choosing Associated Imaging Solutions, you’re not just getting a printer; you’re partnering with a team dedicated to maximizing your productivity and efficiency. Explore our range of copiers and printers to find the perfect fit for your business needs. For more information, visit our Copiers & Printers page.
Together, let’s turn printing challenges into opportunities for growth and success.


